

Beauty Is Pain: A blow-by-blow of my Browhaus microblading experience
Last month, I did an epilating story which entailed a lot of pain and experimentation, all in the name of beauty. This time, as other writers shied away from another potentially painful procedure, I begrudgingly said yes to Brow Resurrection, a semi-permanent makeup microblading service by Browhaus. This gave me an idea to start a new column called “Beauty is Pain,” where I would try out scary-looking and “painful” (or perceived to be painful) beauty treatments. We hope that doing this will make the treatments less intimidating by explaining the process and sharing our tips to make your experience safe and comfortable.
While I knew of fellow writer Kim’s microblading success story, I was cautious about having my own brows microbladed since I’ve heard of so many horror stories like people ending up with terrible brow shapes, red brows, and allergic reactions. Spoiler alert: little did I know that I would end up with the best brows of my life!

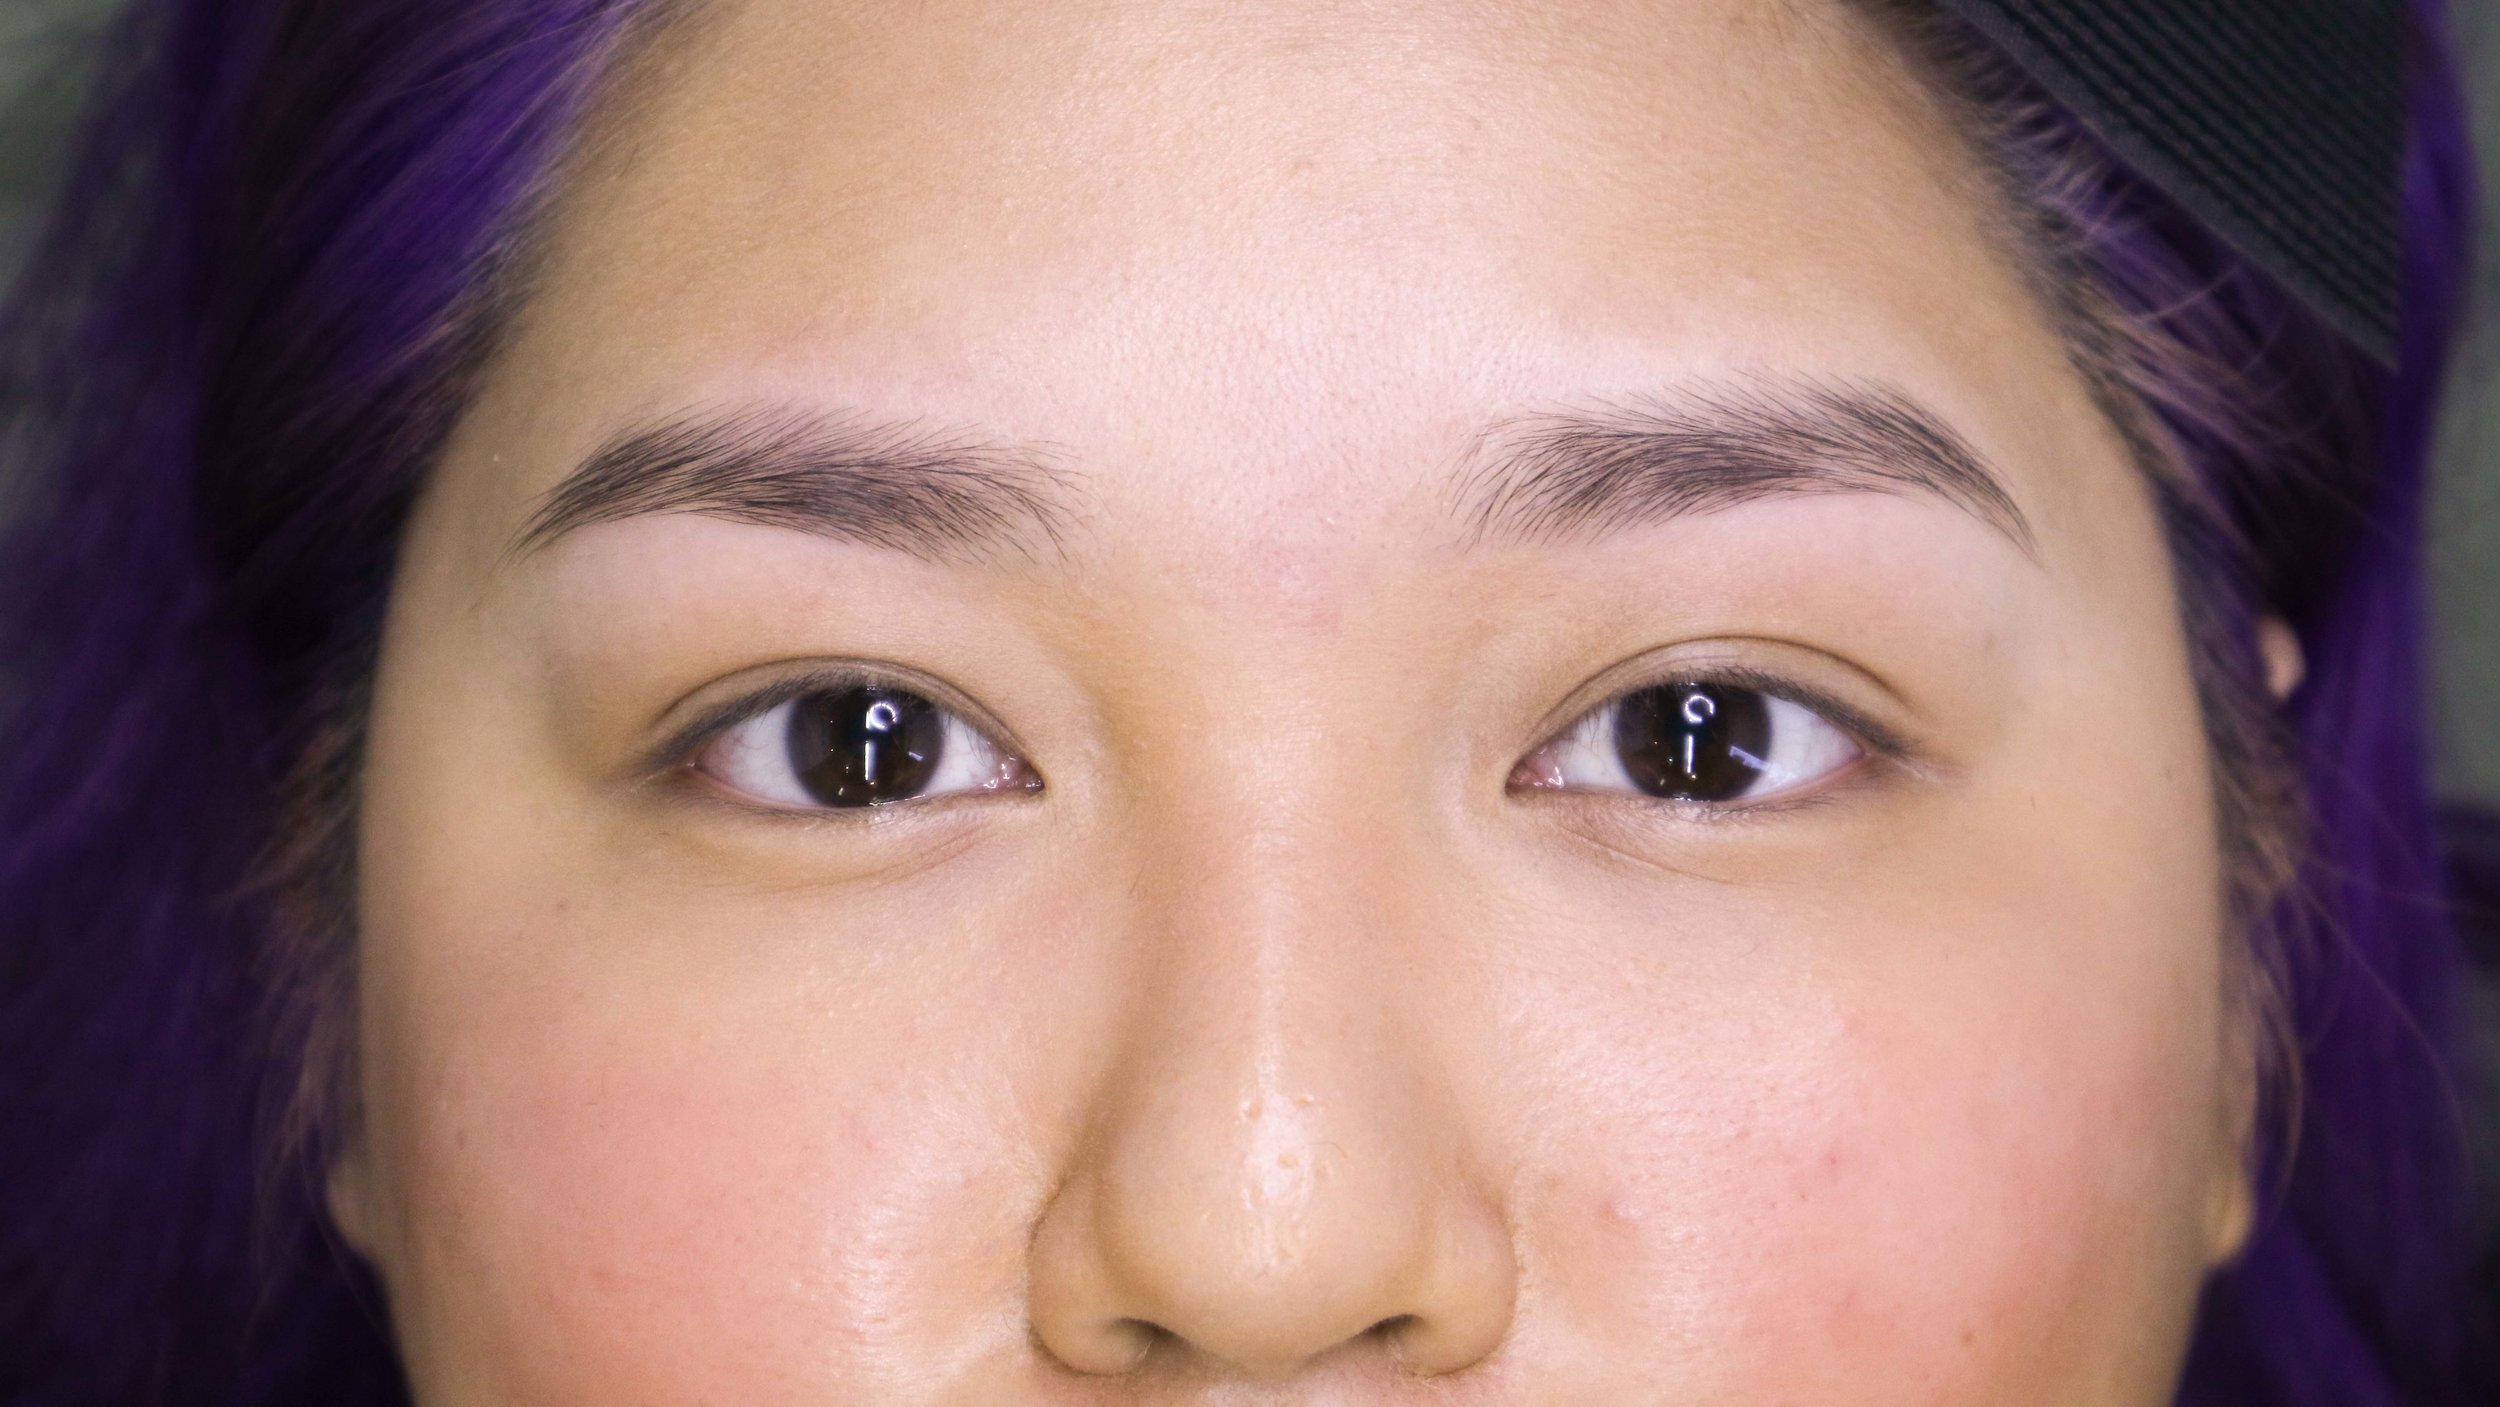
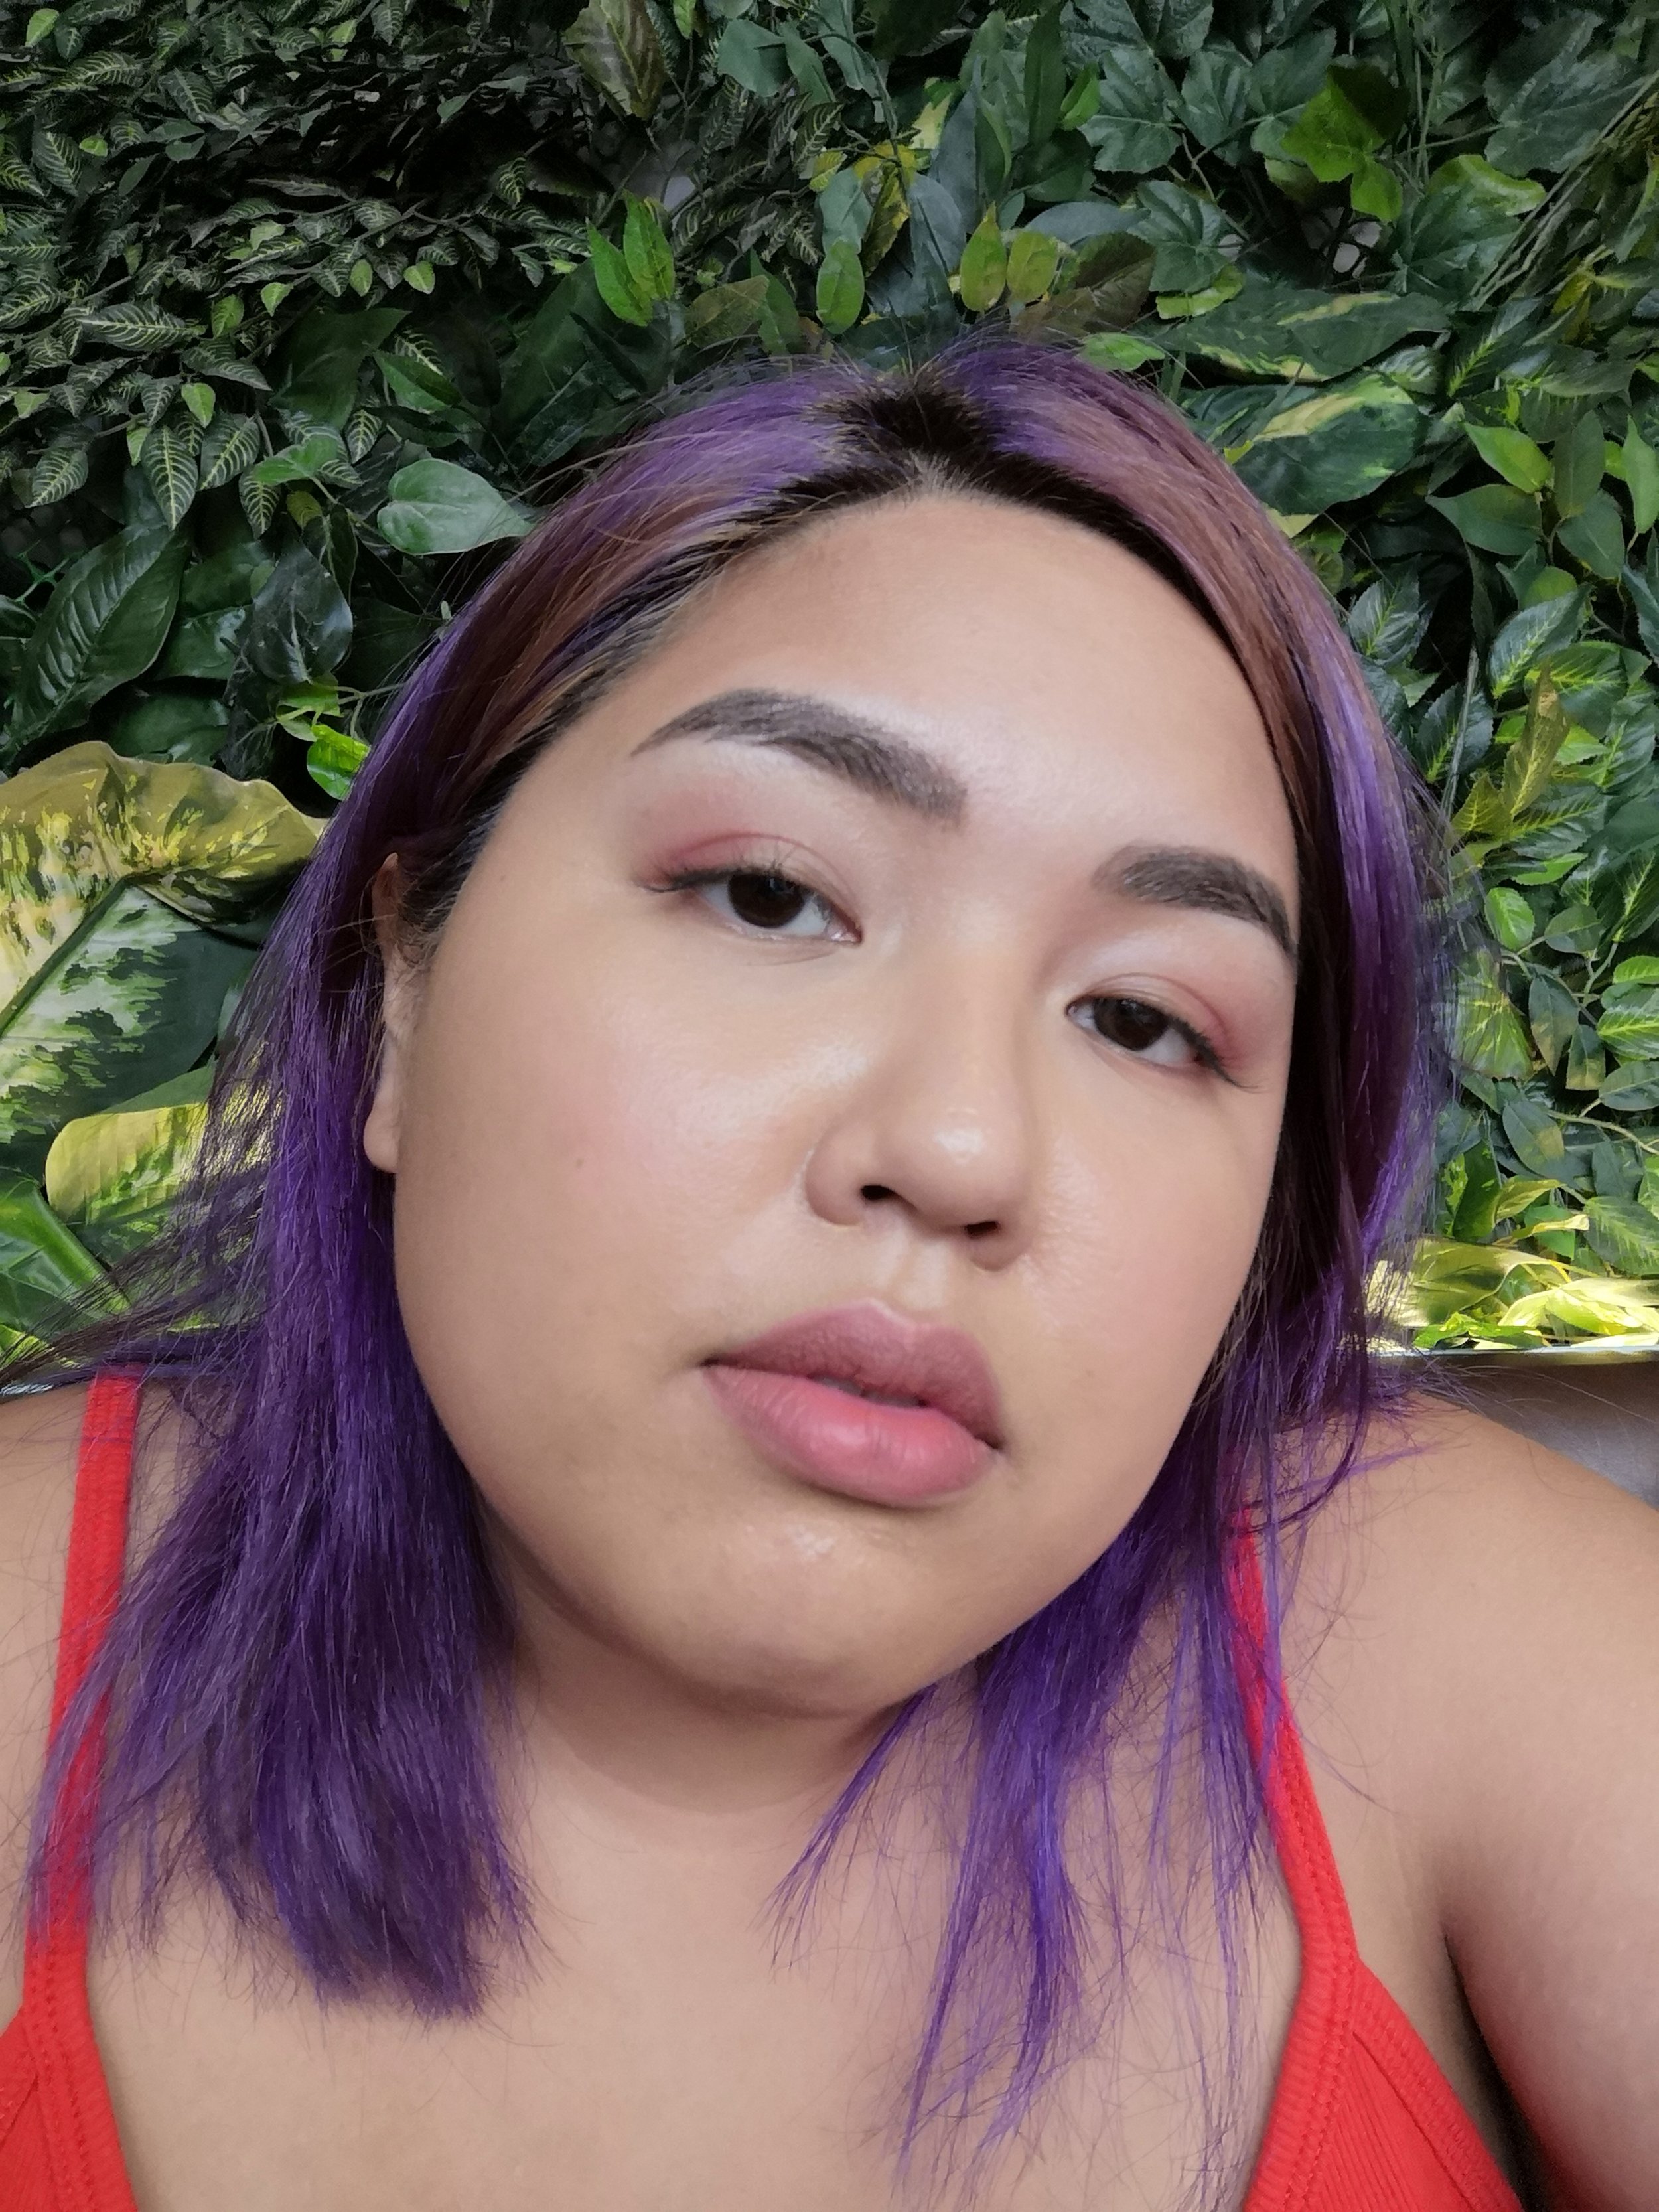
My brows before: not bald but not defined either, with missing tails and a couple of bald spots
The Brow Resurrection treatment has different “levels” of brow definition options to choose from. Brow 2.4 or Classic involves adding realistic hair-like strokes; Brow 2.5 Soft yields finer strokes for a softer look; Brow 3.0 Full adds more “life-life” strokes to create (what else) a full brow; and Brow 3.0 Ombre combines strokes and ombre shading to create a more filled-in look. This allows you to choose a brow style best suited for your needs and preferences. Since my job entails wearing a full face of makeup, I decided to try out 3.0 Ombre.
Customers are first consulted about preferences, medical conditions, skin types, and even medications to ensure the safety of the procedure. I specified that I didn’t want an exaggerated insta-brow, warm brown pigment, and an unnatural arch. Since I’m pretty anal about brows, I also looked up a bunch of photos that I didn’t want done, to be extra safe. Here’s what went down:

Step #1: Cleaning
My brow artist began by threading my brows to ensure that they were shaped correctly. I knew that Browhaus is known for being one of the best places to get your brows “constructed” so I just let her do her thing. She created just a bit of an arch since I said I prefer them straighter rather than arch-ier.

Step #2: Drawing
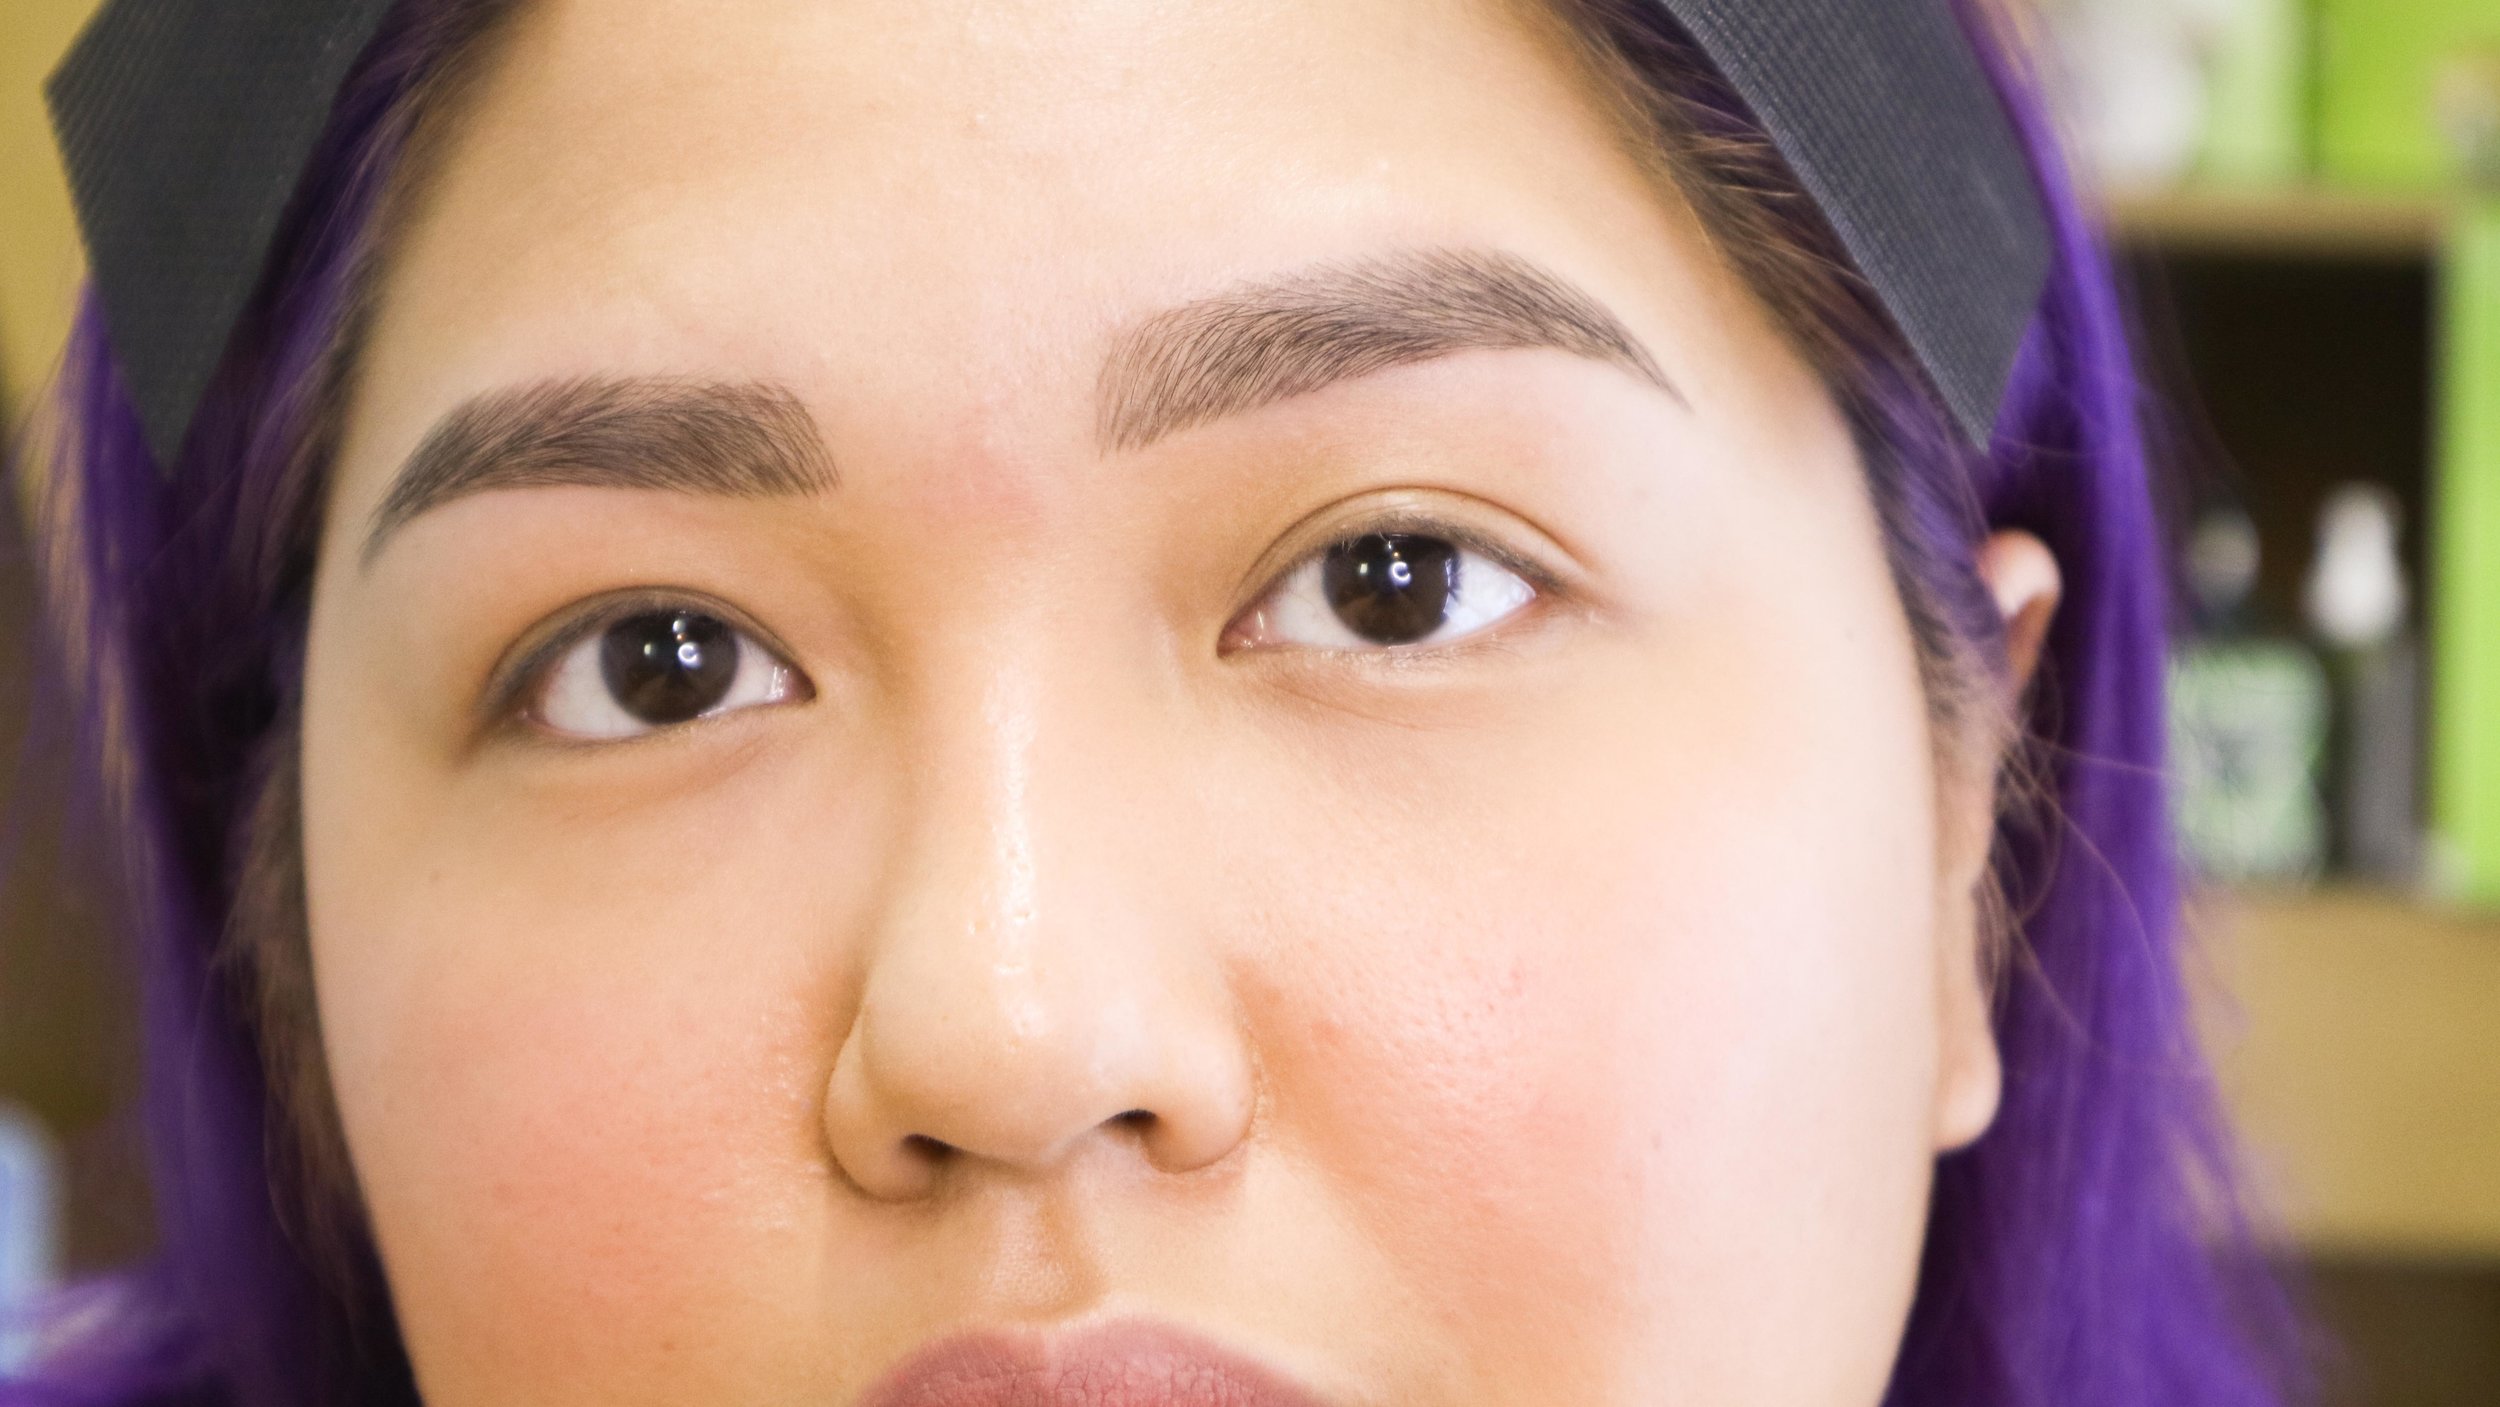
After shaping my natural brows, she used a dark pencil to draw in the “new” shape. As simple as this may sound, this process takes the longest because the aim is perfection.
The brow artist, who told me she had been in the industry for 10 years and trained at the Browhaus Academy in Singapore earlier this January, was like a master calligrapher. She carefully drew in the hair-like strokes that she would later use to trace the cuts. The photo on the right shows the the final drawing, which is darker than the actual yield, but serves as guidance for the artist.

Step #3: Numbing cream
As the name suggests, the microblading service involves the use of an actual blade. To lessen the sensation, she applied numbing cream all over my brows and over some of the surrounding area. The cream is a Browhaus-exclusive formula, and it was left to sit on my brows for 20 minutes.

I swatched the pigment before it was applied.
While waiting for the cream to take effect, the artist custom mixes the pigment. Each customer will get their own mix, depending on their hair and preferences. She swatched them on my hand so I can approve them, and she did it pretty well because I specified that I did not want them to be a warm brown. The pigment for the strokes are darker, and the pigment for the shading is lighter.

Step #4: Cutting strokes
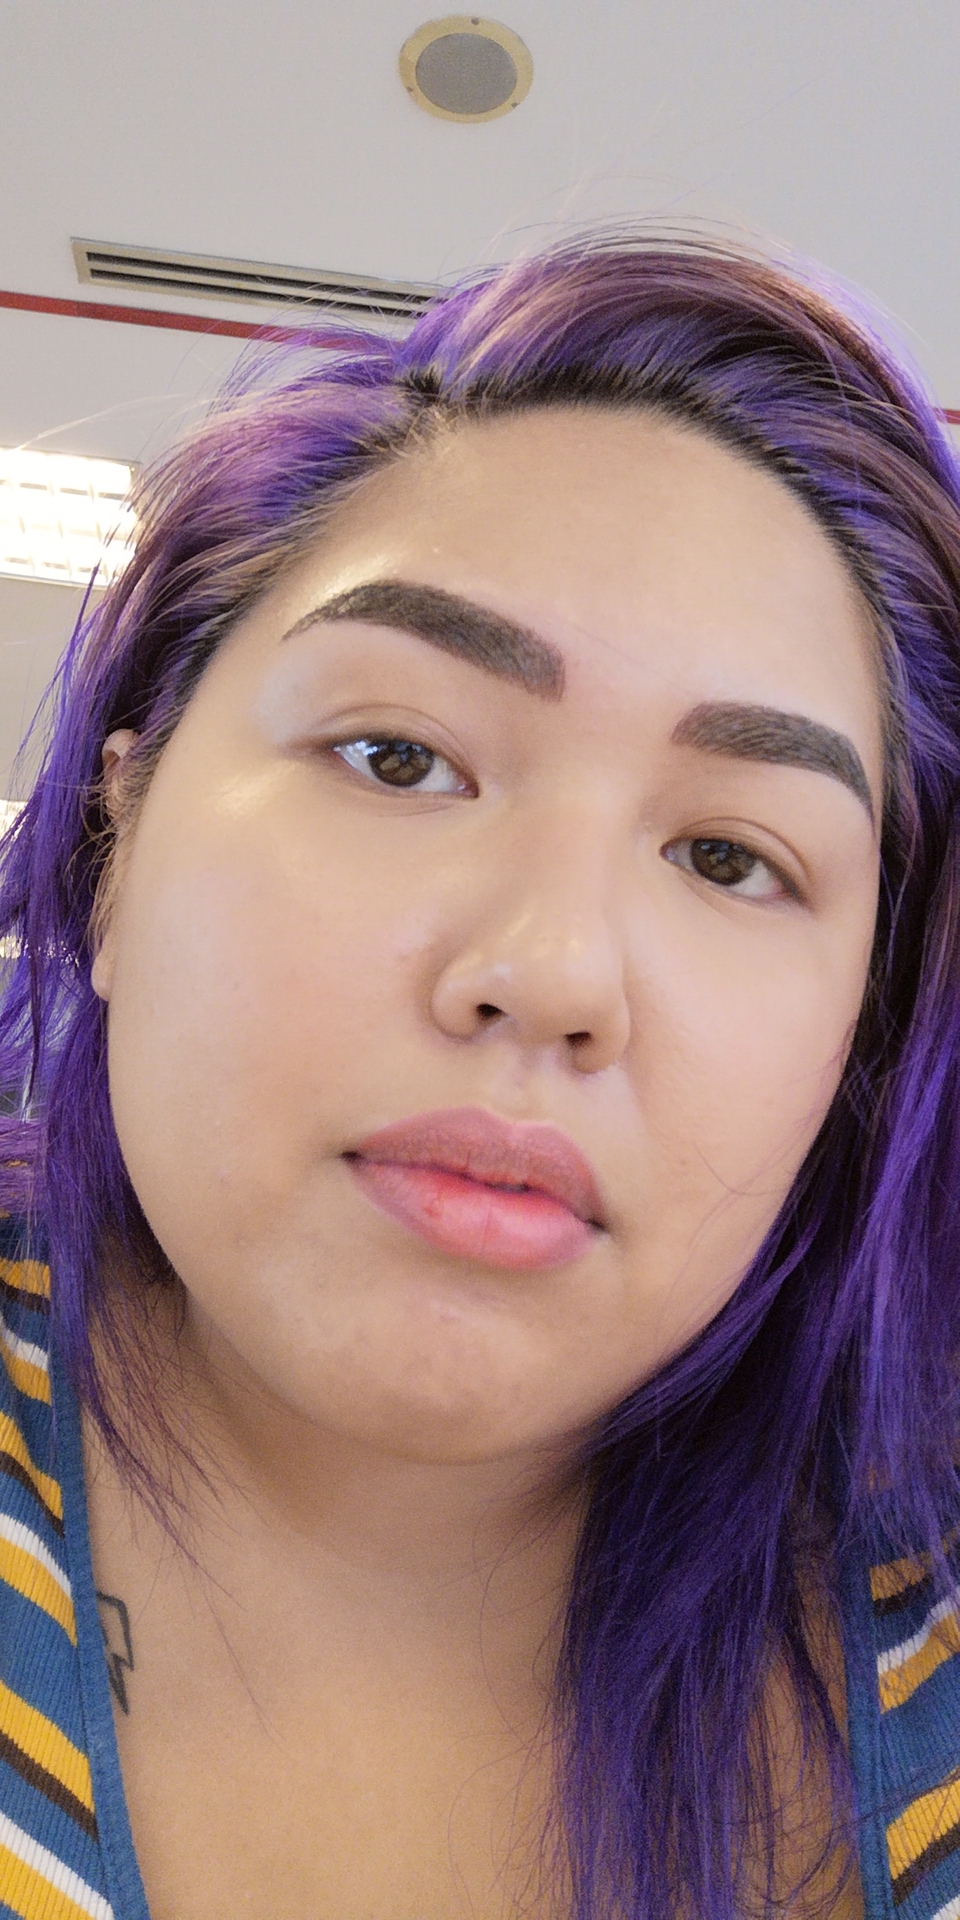
After the numbing cream had set in, the artist began creating the strokes with an x-acto-like blade. “Cutting” is putting it lightly, as I actually never felt any tearing. I could sometimes hear light cuts but it felt like she was just drawing strokes with a very blunt pencil. You can see in the photo that there was bleeding, but I really wouldn’t have known it if not for the photos. Since the strokes had already been drawn with the pencil beforehand, applying the pigment took no time at all.
We were instructed to tell the artist whenever we felt any sort of sensation, and while I didn’t feel pain, I wanted to be cautious and inform my artist that there was a bit of stinging. To mediate this, she applied more numbing cream and we waited a few more minutes before we proceeded.

Step #5: Shading
We then proceeded to the last step, which was to add shading to the area. This is what differentiates the service from Classic, Soft, and Full, since the other services are just strokes or just shading. Ombre marries all of those to create a pair of brows that look filled in by a master - snatched but completely natural-looking!
Still, the only thing I felt was the pressing of a blunt tool on my forehead. Browhaus describes their new services as “almost painless” (compared to previous iterations). A thing to note though: the ladies at Browhaus all agreed that I have a very high tolerance for pain.
Step #6: Final cleanup
The last step was simply wiping off the pigments and evaluating what else needed to be done. The brow artist added a few more finishing strokes, and then I was off to be oriented for after-care! The whole process took about 2 hours (although probably less since a bunch of other people wanted to see the progress and results).

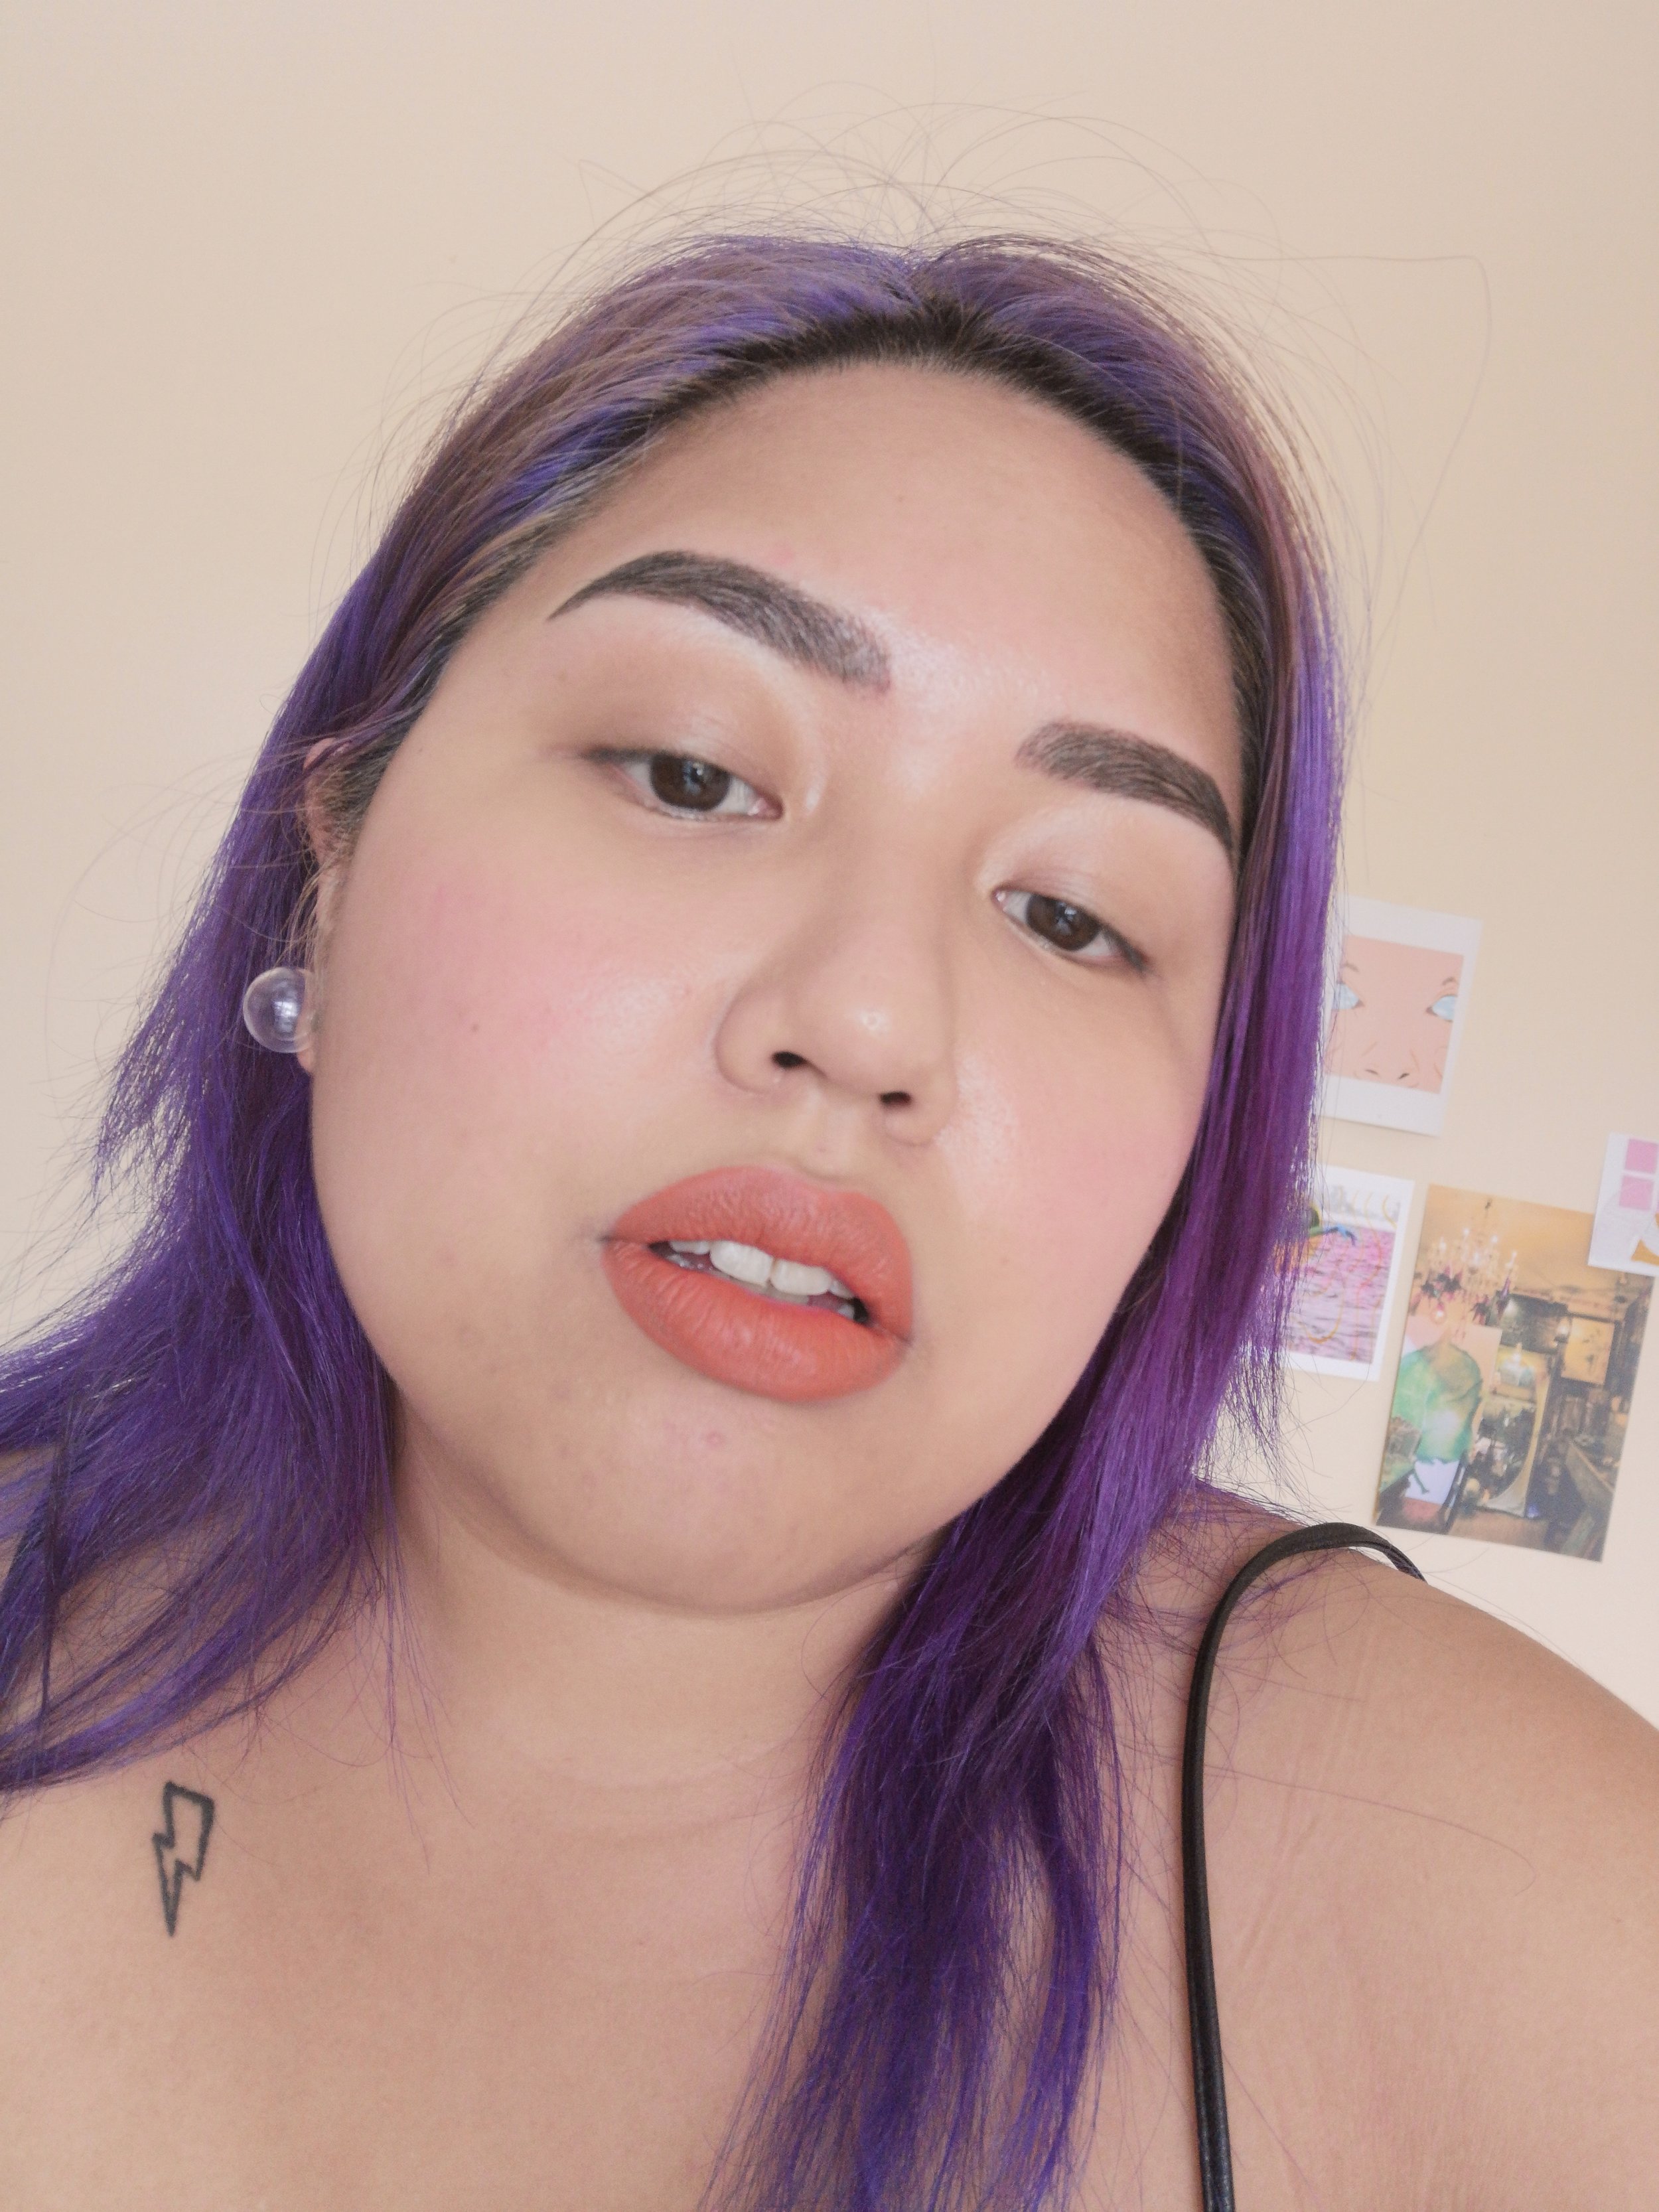
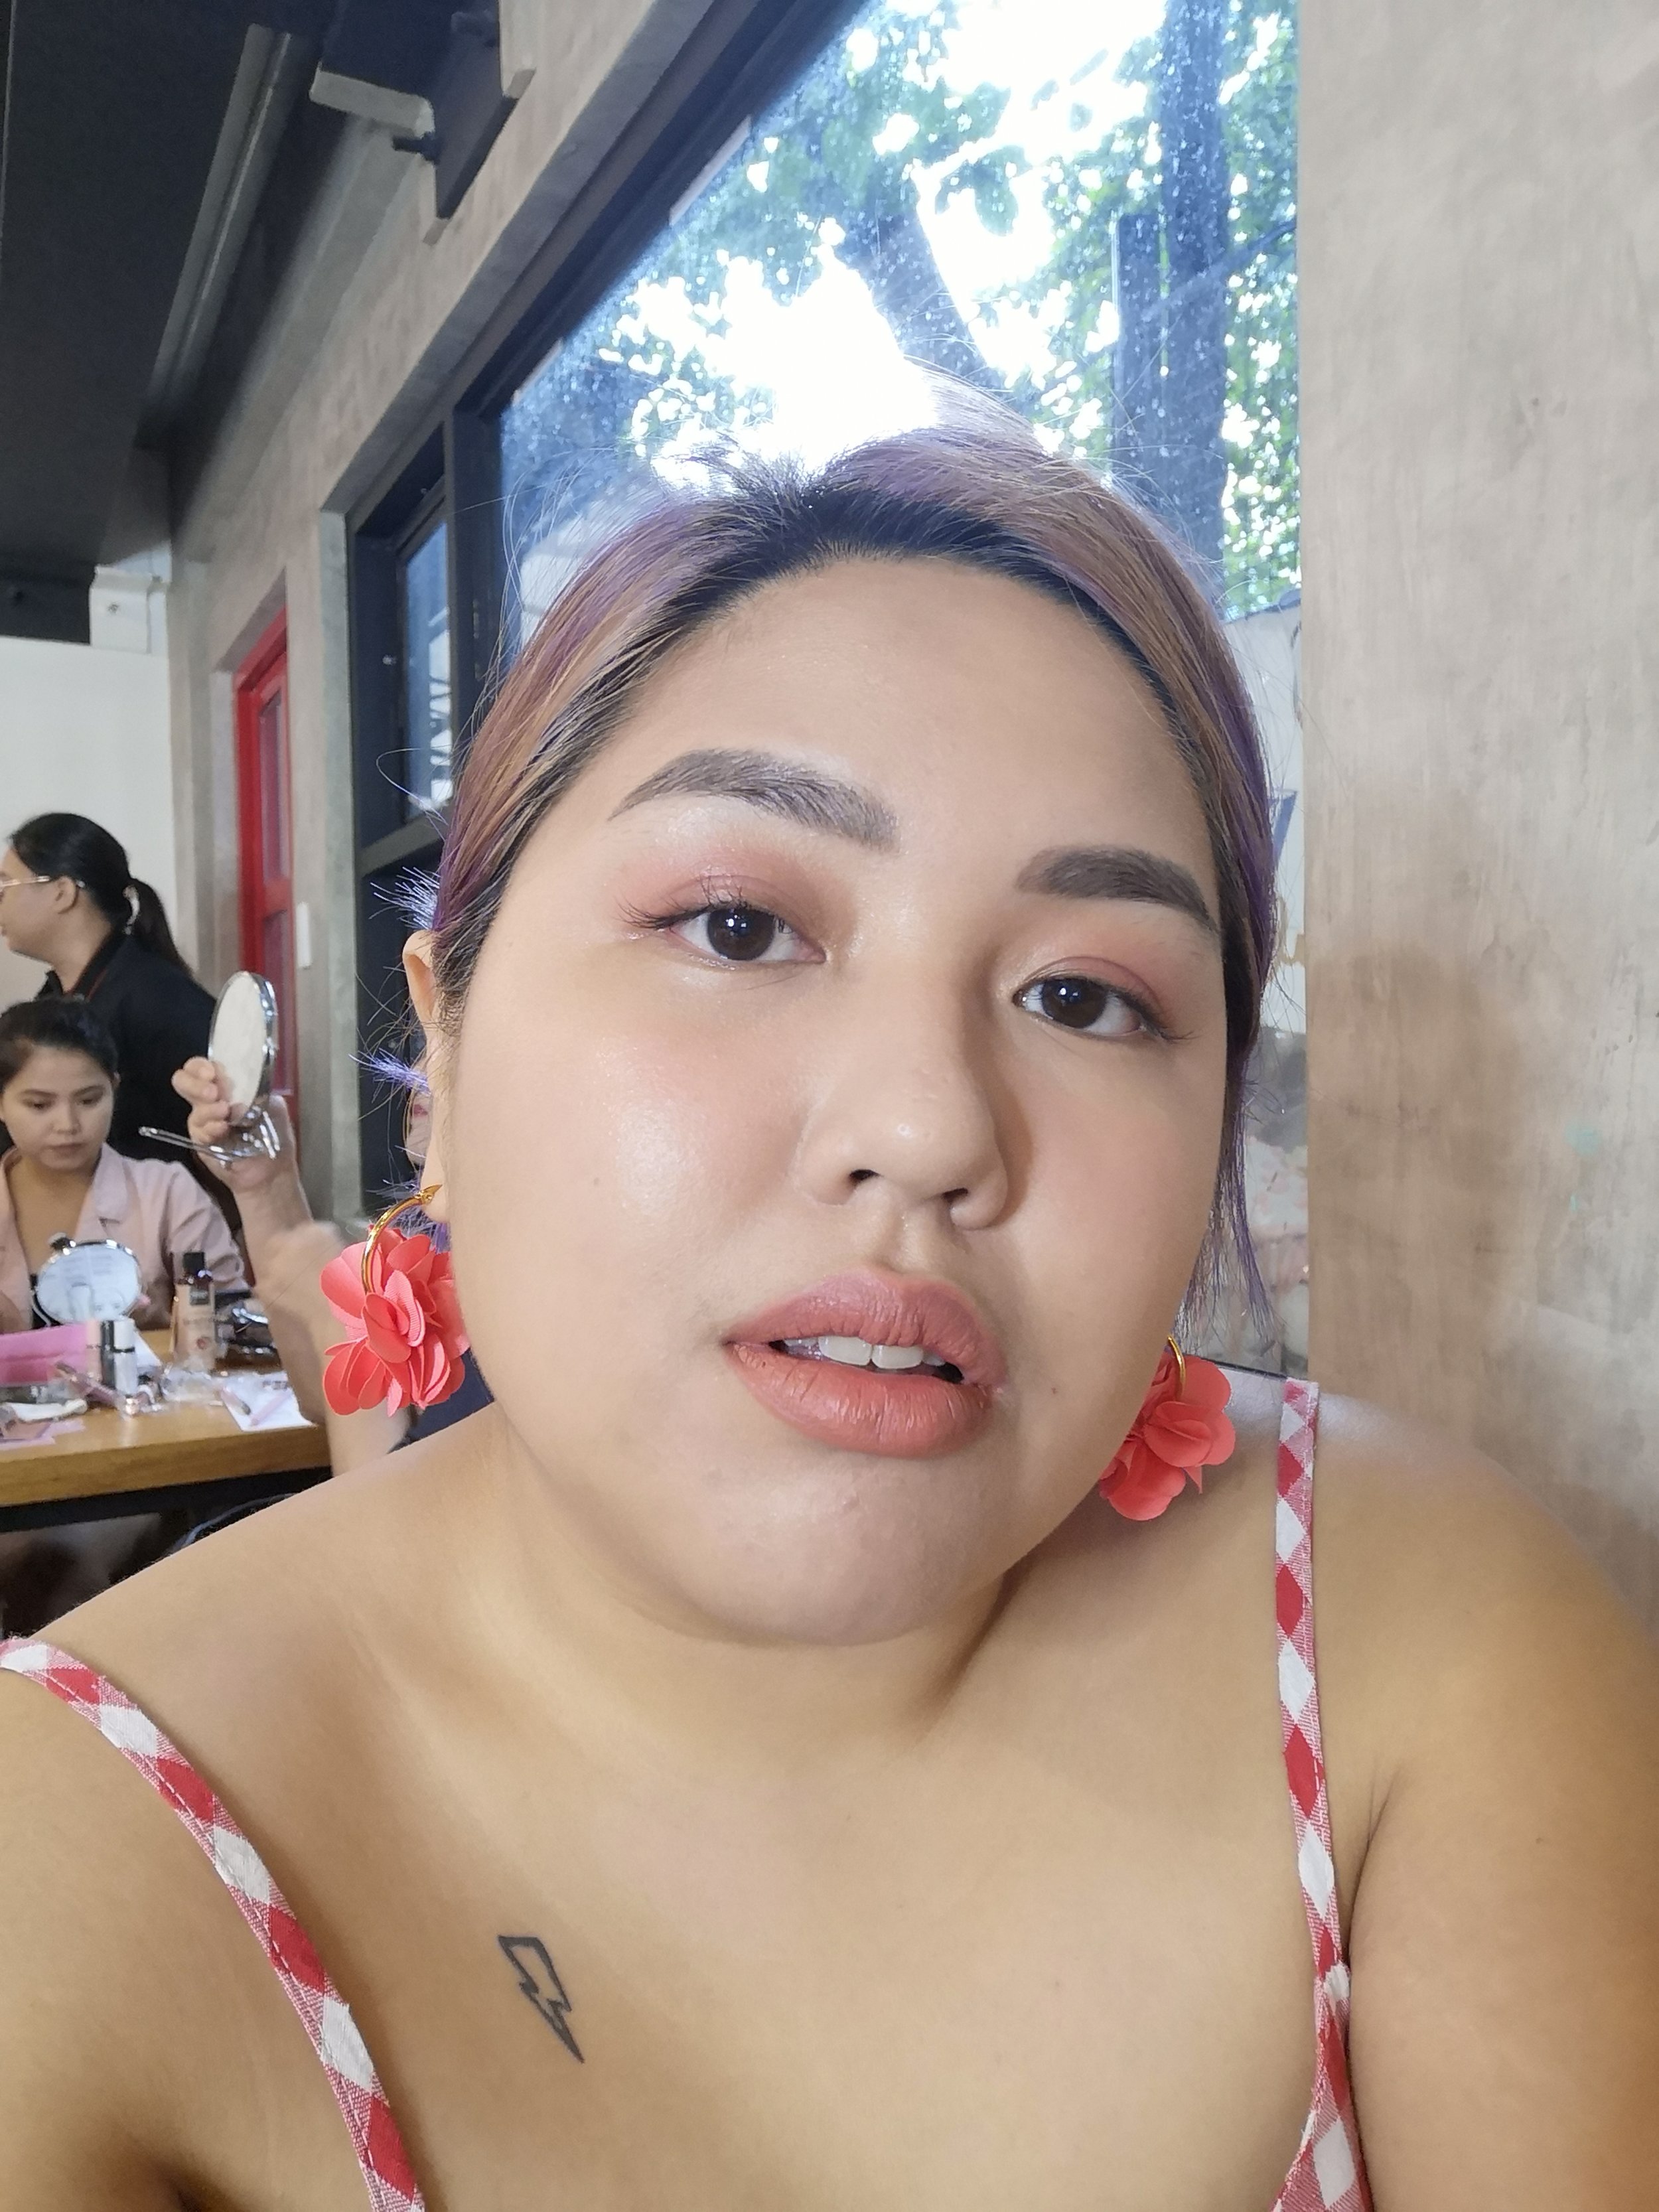
Post-treatment: The final product is super dark since the peeling will yield the actual shade which is 1-2 shades lighter. I was initially scared of the depth, but felt way after during the recovery period!
After-care notes:
I was given strict instructions for after-care. Every morning and night, I had to apply “Build,” a post-treatment care builder to “repair and regenerate skin” (Ingredients: Basic Fibroblast Growth Factor) and “Fix,” an anti-scarring balm (Ingredients: Vitamin A, Lanolin, Paraffin, and White Petroleum), with a cotton bud. This is similar to after-care for other tattoos, where cleansing and protection with a balm suffices.
Scratching was forbidden, which makes total sense, since that would ruin everything. I remedy this by tapping the forehead area, avoiding the brows, to alleviate itching. It’s been 3 weeks since the microblading, and I still get itchy sometimes so this will require a lot of self-restraint.

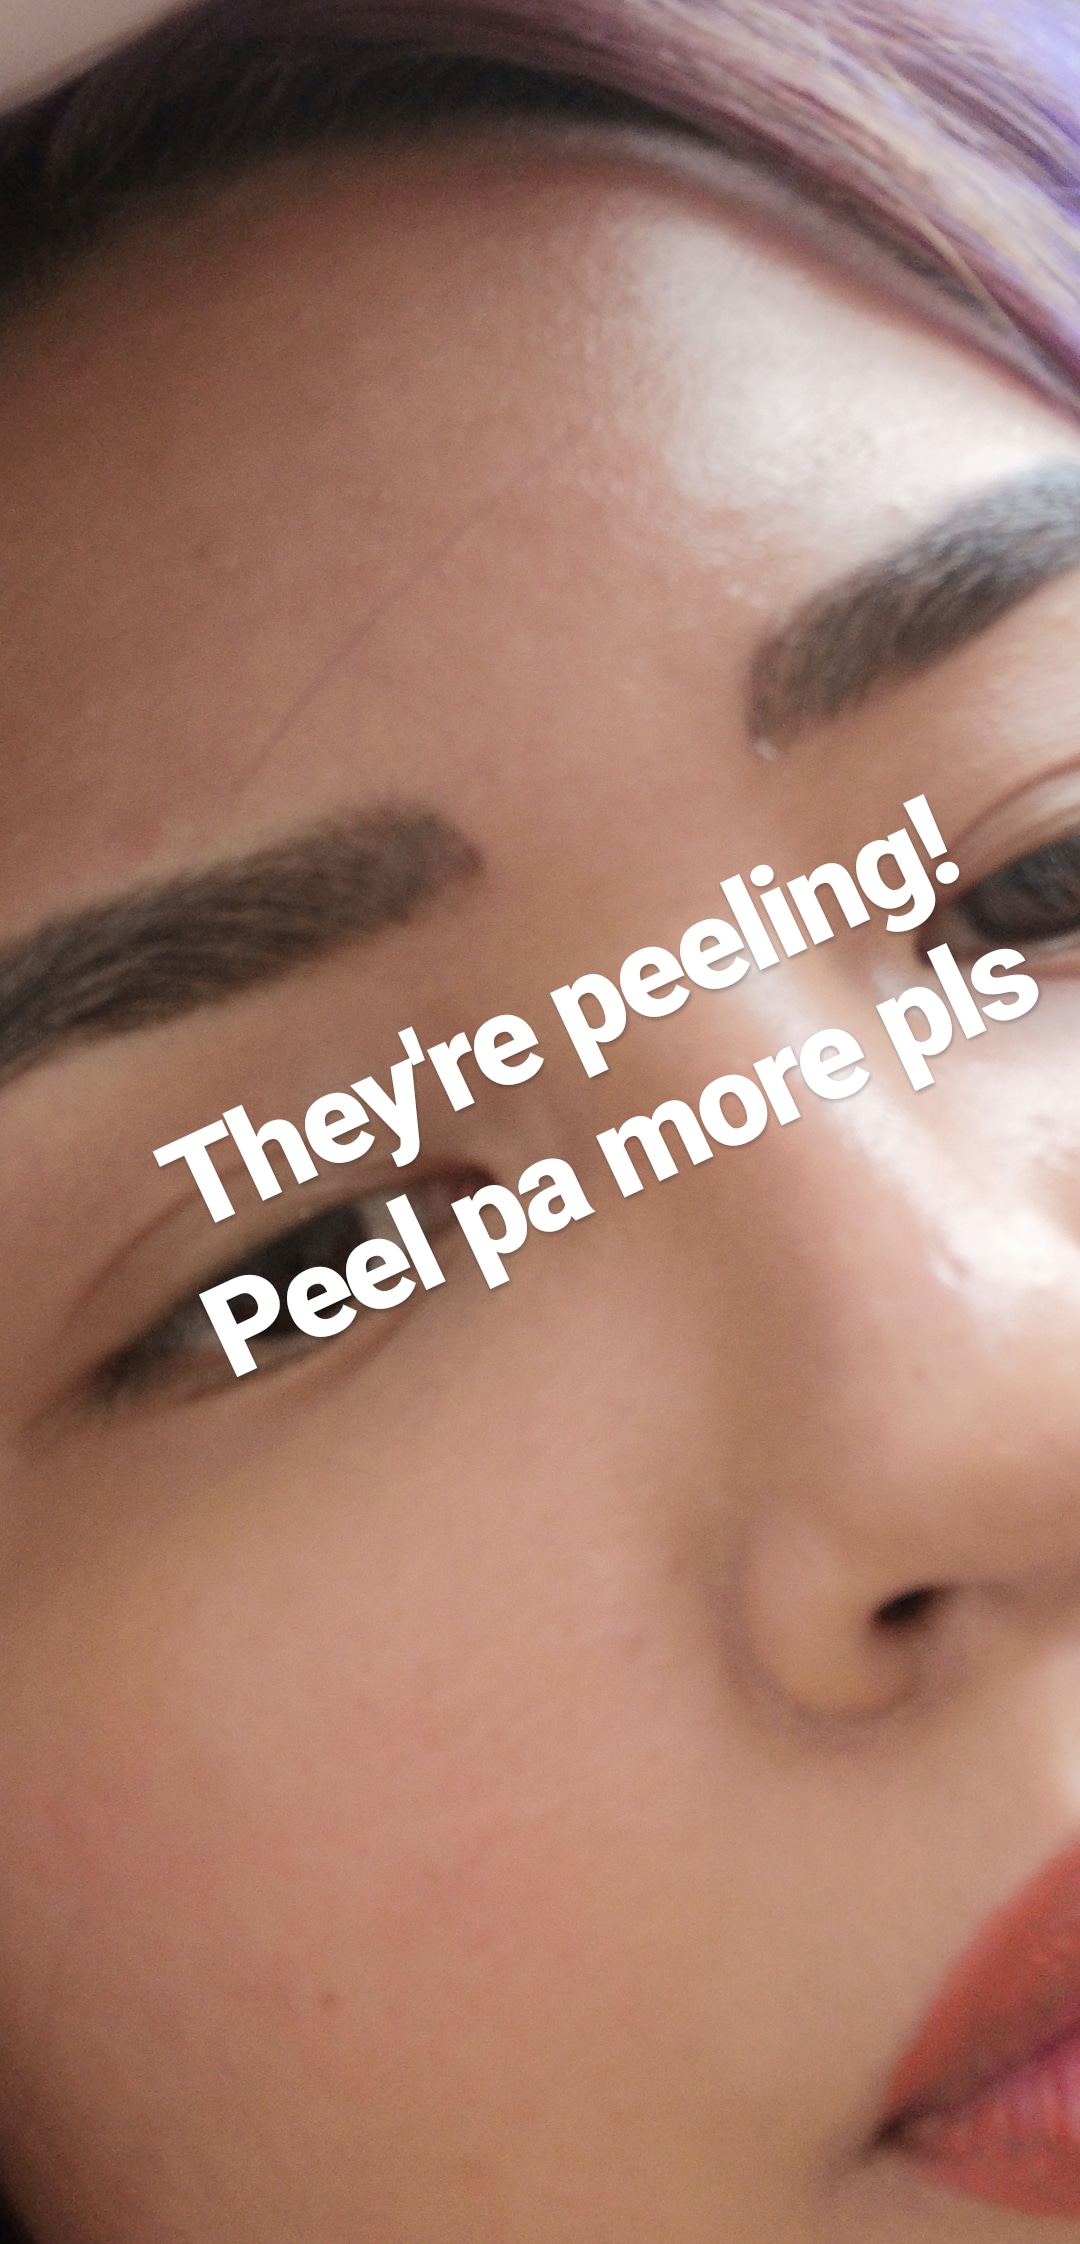
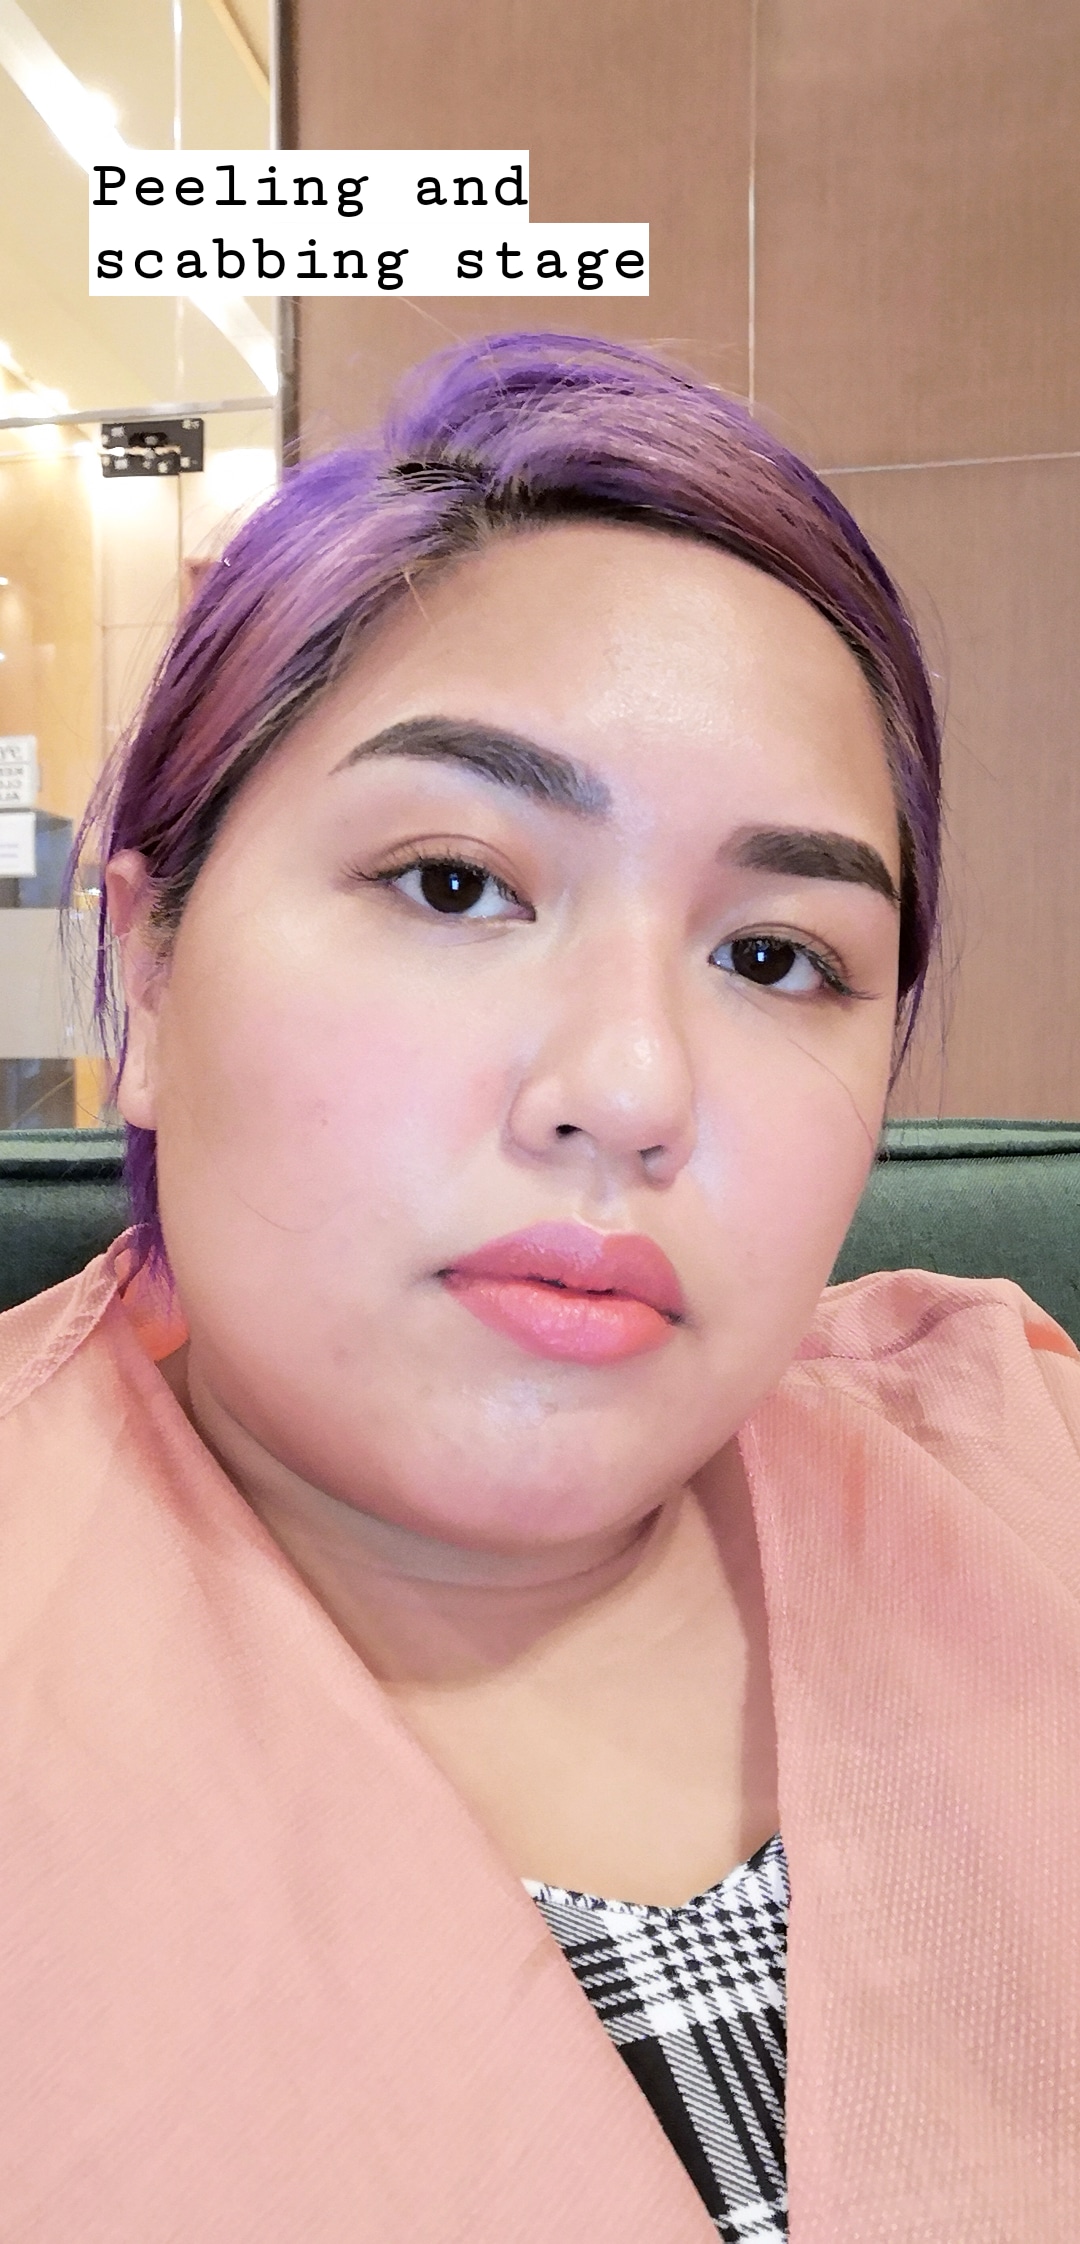
Peeling is normal and will happen on its own. My brows started peeling after 4 days, which calmed my jets. When the brows peel, the original darkness subsides to reveal the actual shade, which looks exactly how I’d do it with a grey-black pencil! However, to this day, I think there are still some small fragments that need to peel off.
The hardest part of this challange: you cannot wet your brows for the two-week recovery period. This also meant that I could not go to the gym for two weeks since newsflash, sweat is liquid.
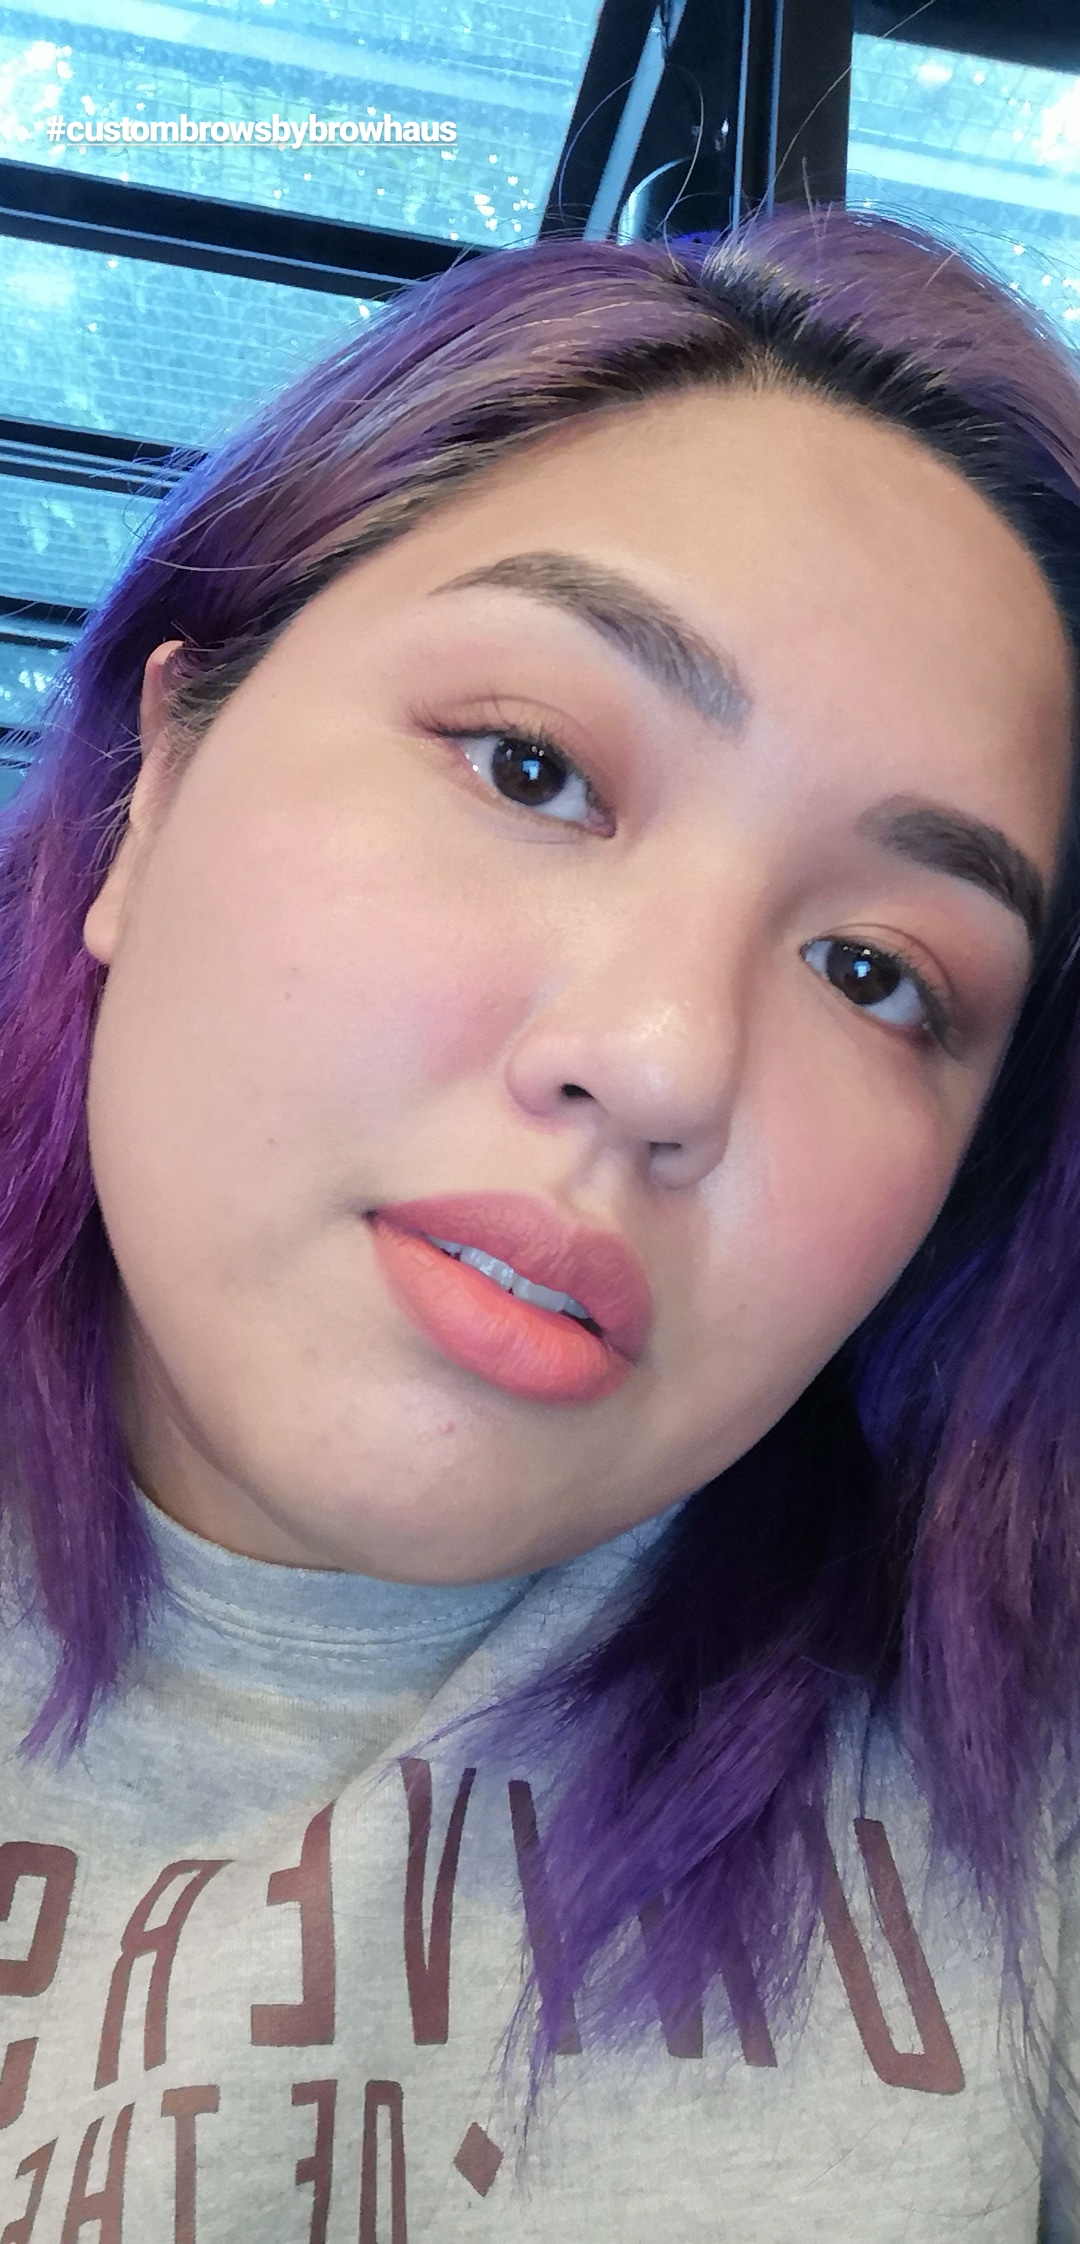
About a month (or two) after the initial session, customers need to have their brows retouched in-house. I definitely need this since the front of my right brows needs more gradation and a bit of re-definition.
I stopped using acids for two weeks as an extra precaution. I didn’t want anything to provoke irritation, burning, or unwarranted scarring, so I only moisturized the lower half of my face! I also learned to use foundation only on the lower half of the face (and pretty much just on the red areas) to avoid putting makeup remover and cleanser on the brows.
I had to specifically ask massage therapists to avoid the brow area during massages.
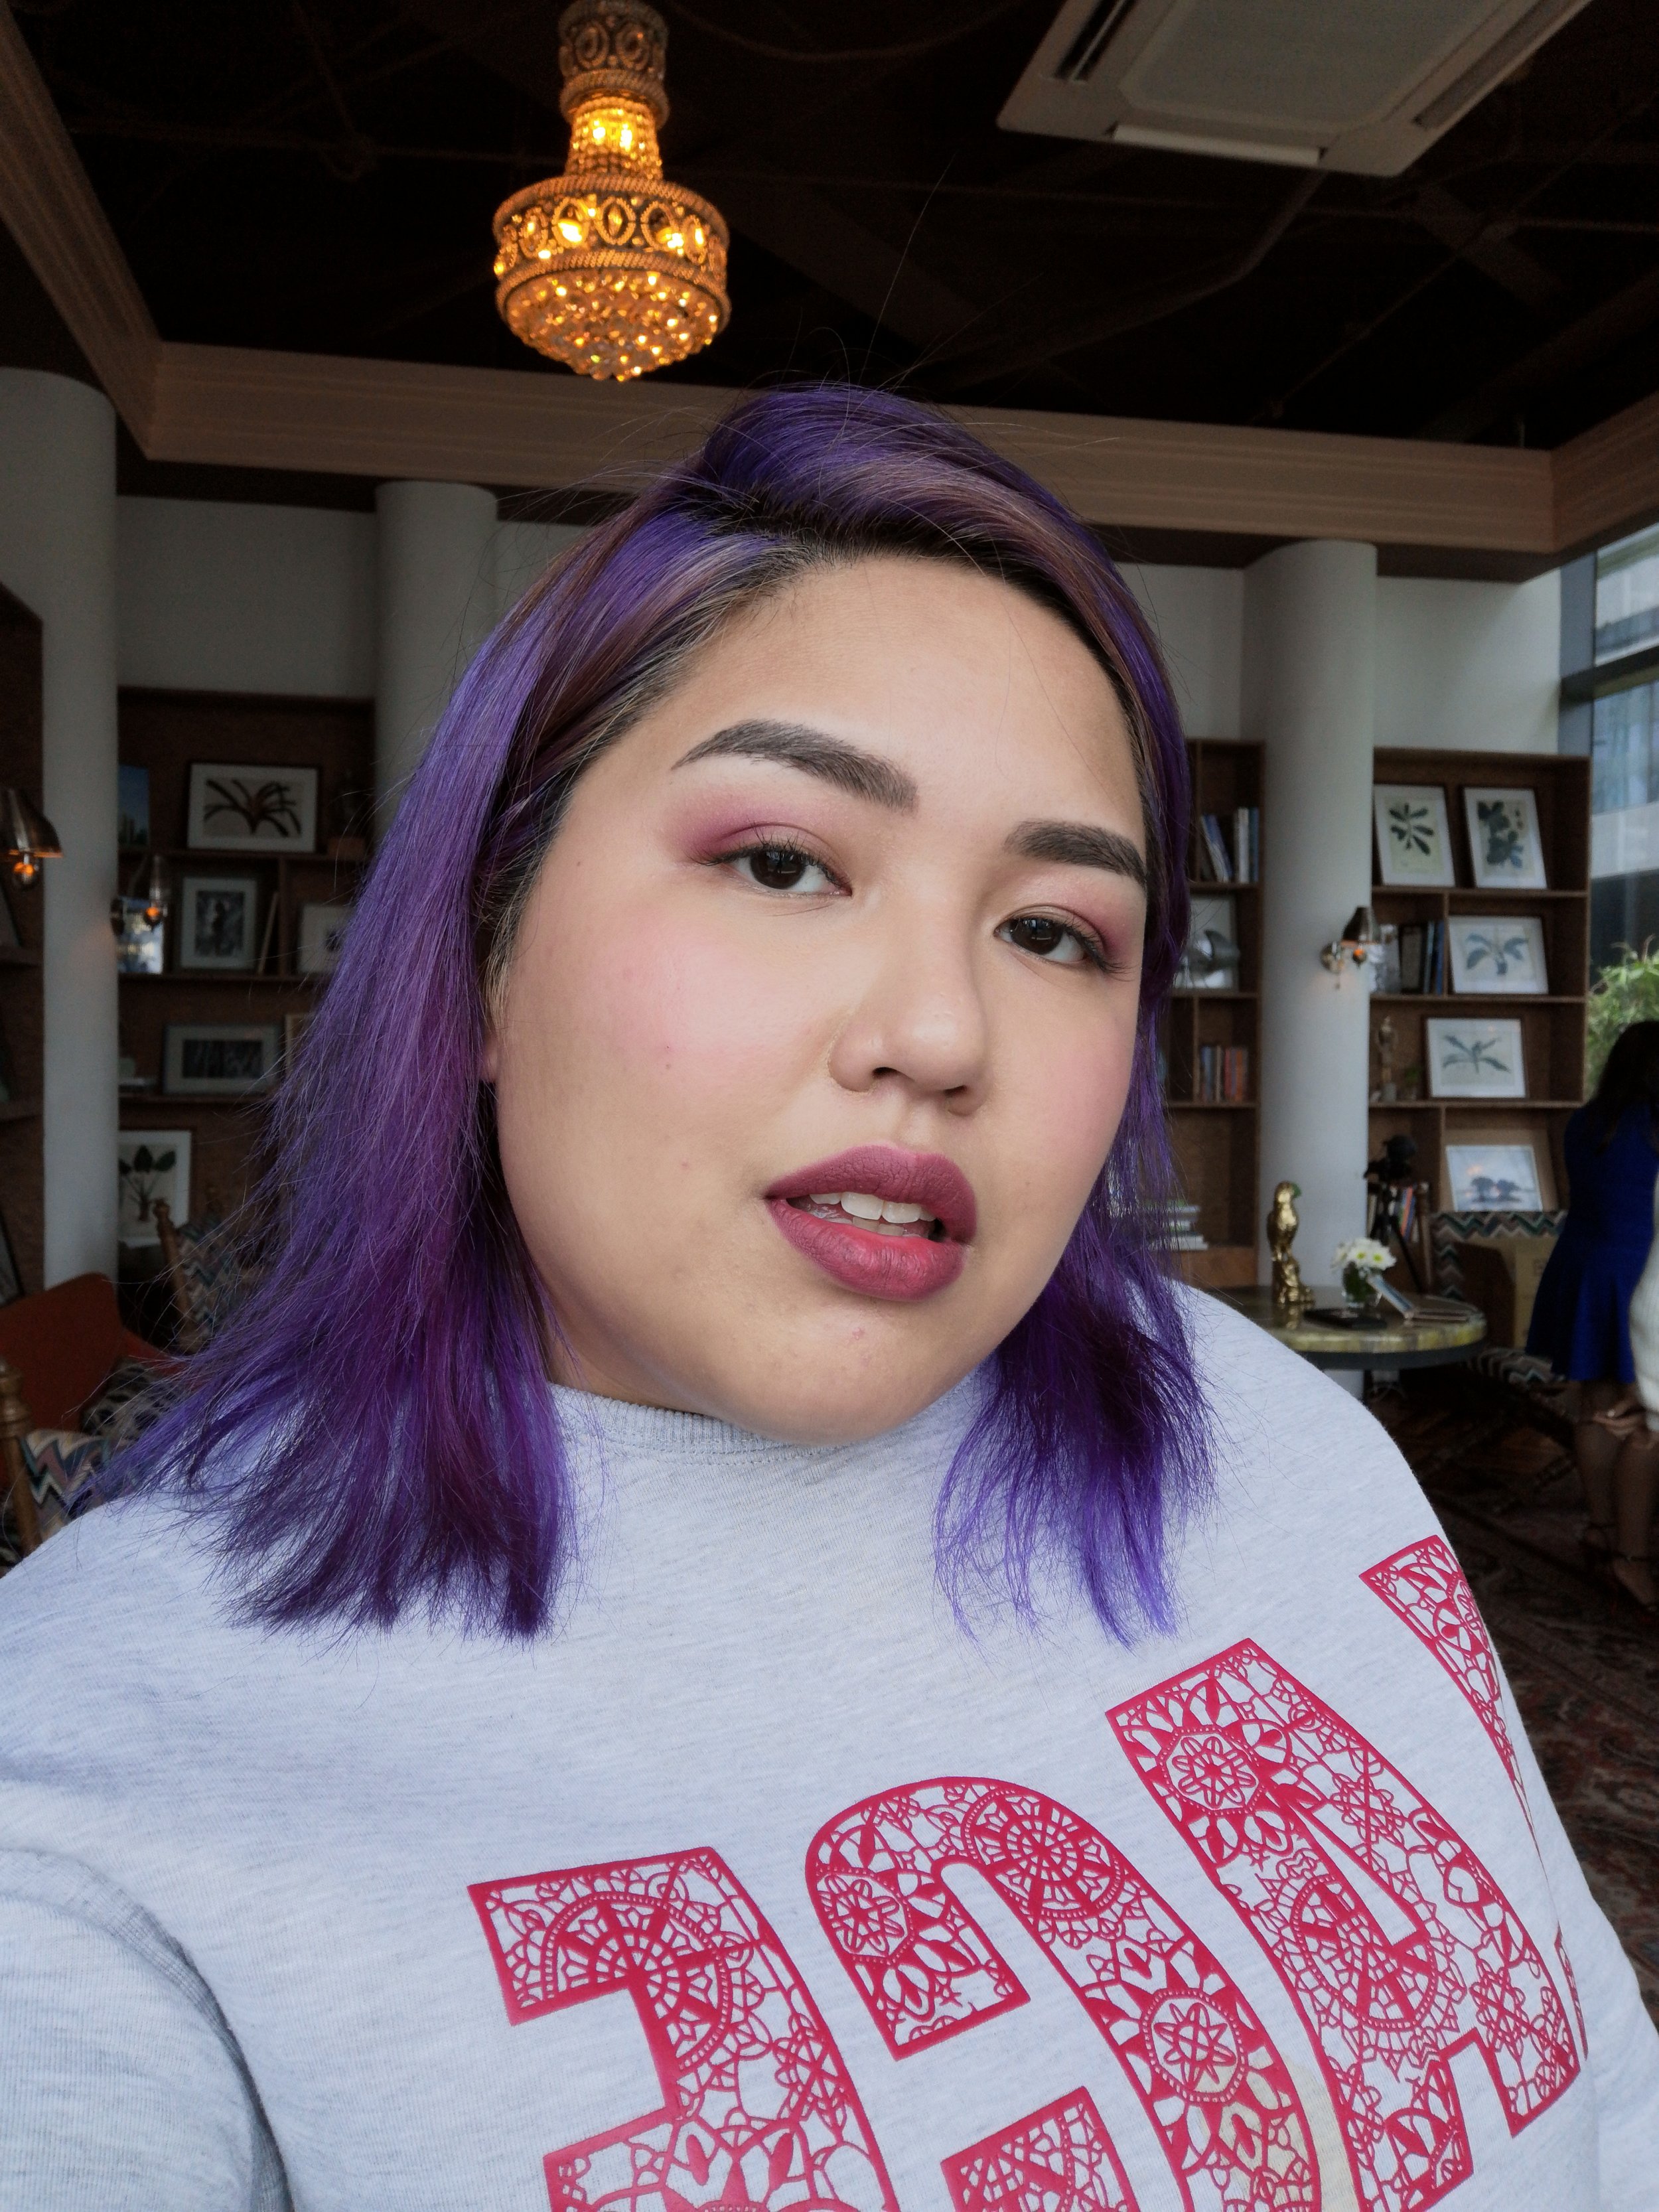
Here’s a slideshow of the gradual recovery process which took 14 days:
Final thoughts
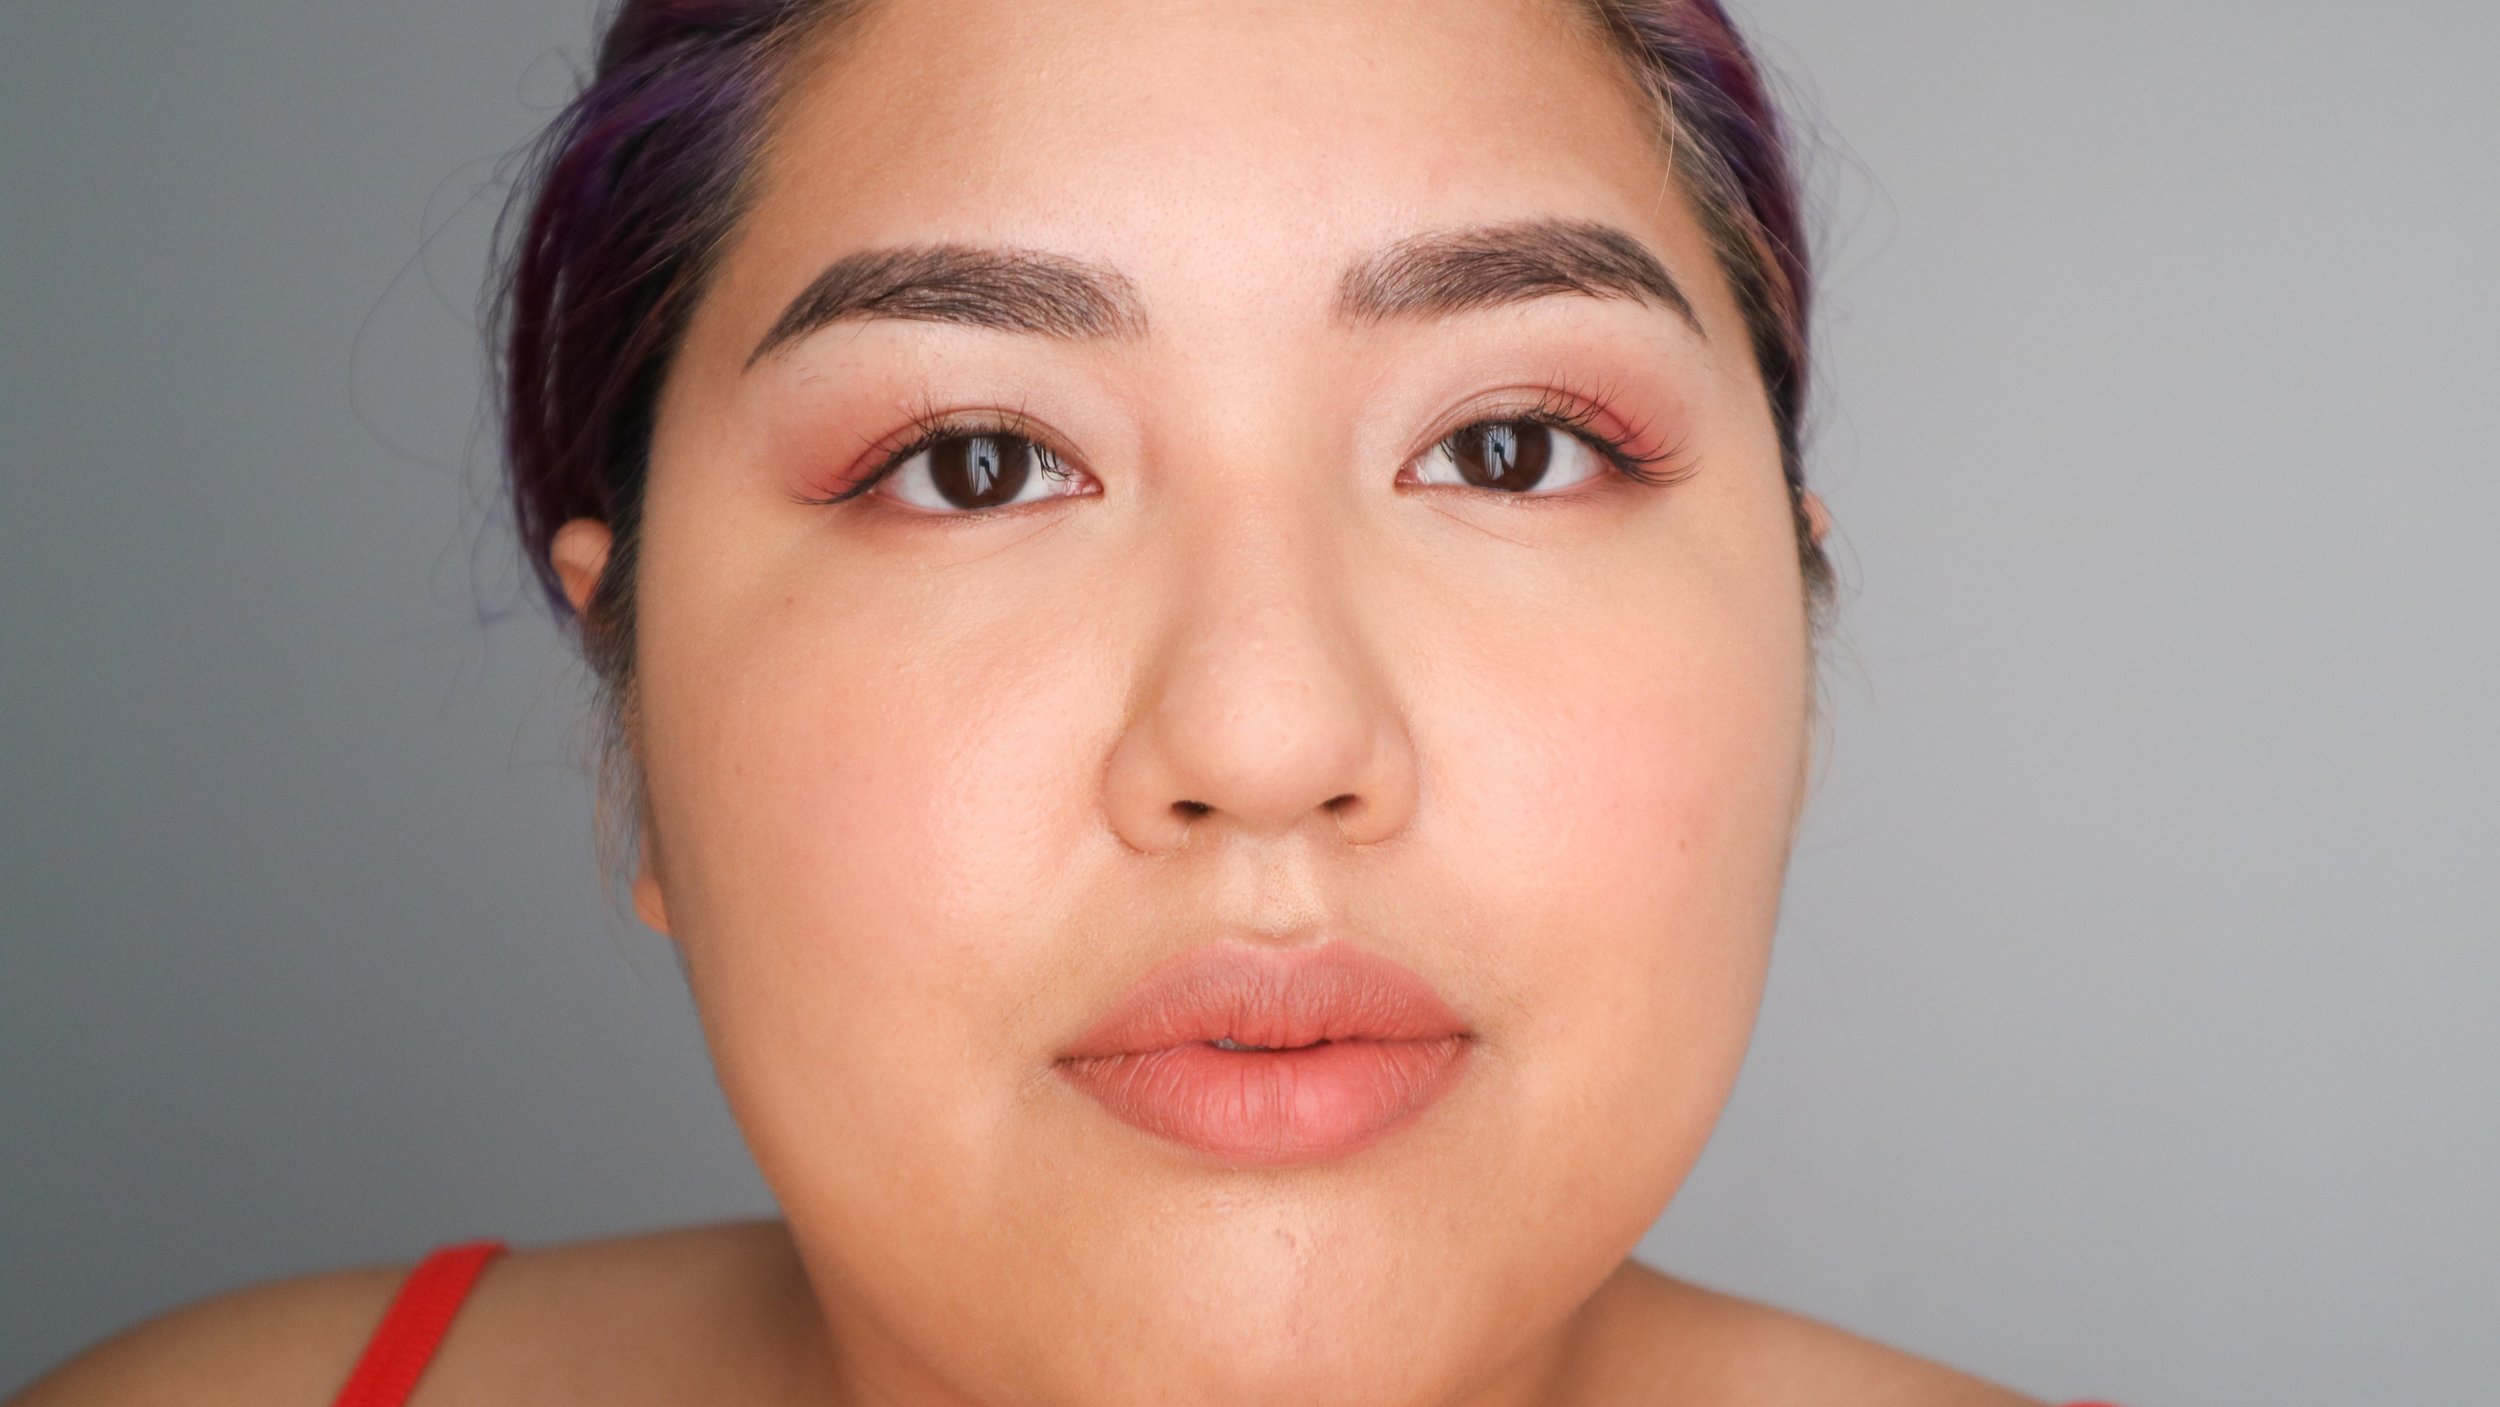
I totally love my new brows! I get what they say about Browhaus’s expertise, because I’ve seen a lot of botched microblading (from the internet and from my real-life friends) and I rest soundly in the knowledge that mine are pretty much perfect. They look exactly how I’d do them, and since microblading, I do nothing for my brows when I get ready. I used to think that people who say they only do brows in the morning were crazy, but now (coupled with a good skincare regimen of course) I actually go makeup-less more often!
The best part? My brows look good either way. I also realized how much time is saved when you don’t have to draw brows on every morning, and I dread the day that my tattoos fade (although the lifespan of Brow 3.0 is 1.5-2 years). I now regularly get compliments from friends (who now also want their brows microbladed) and even strangers who didn’t realize they were semi-permanent tattoos!
The price will be the biggest barrier. People gasp when they hear that the Brow 3.0 costs P40,000 (originally at P80,000) and I can’t claim to be able to afford such a luxury. Therefore, I can only recommend the service if you’re one or more of the following: a celebrity/public figure/spokesperson/officer who relies on appearances for projects, busy to the point that the price justifies the time saved, cannot be arsed to do their brows perfectly everyday, and need the security and safety of asking a brow artisan to take care of your face. You may also opt for their cheaper services (Classic, Soft, and Full).
Original prices of Brow Resurrection:
- 2.4 Classic P42,800
- 2.5 Soft P60,000
- 3.0 Full P72,000
- 3.0 Ombre P80,000
Browhaus Manila has a special treat just for Project Vanity readers though. Get 20% off on the 2.4 Classic until 30 September 2018, and 40% off on 3.0 Full and 3.0 Ombre treatments from 9 September to 22 September 2018! All packages are inclusive of one free touch up. Just give the code PROJECTVANITYXBROWHAUS2018 when booking your Brow Resurrection treatment.
What other “painful” beauty treatments should I venture into next? Let us know in the comments!