

Beauty Sommelier: How to do wine eyeshadow if you have Asian eyes
The wine life is not for everyone, but thankfully, you don’t always have to drink it to appreciate it. Wine palettes are cropping up left and right, and today we’re going to take you through a step-by-step tutorial to create your own wine eye look!
This is simply a general and simplified guide, meant to arm beginners with a working template to follow. If you feel like changing or adding colors, or creating a different eyeshadow map for your own eye shape, go ahead and customize as needed
Step 1: Eyebrows
Start with your eyebrows. It’s better to do your face from the topmost features going down, so that you don’t miss any steps and any fallout may be easier to clean.
I used a grayish brown eyebrow pencil with my brows drawn the K-Beauty way. You may arch your brows or keep them straight; either would not detract from the look because it's the colors that take center stage. I try to avoid blonde brows with wine eyes though because they clash with my go-to color selections. Reddish hues are okay, but it depends on all the eye shadows I end up using. For this tutorial which leans sultry, gray brows would be best.
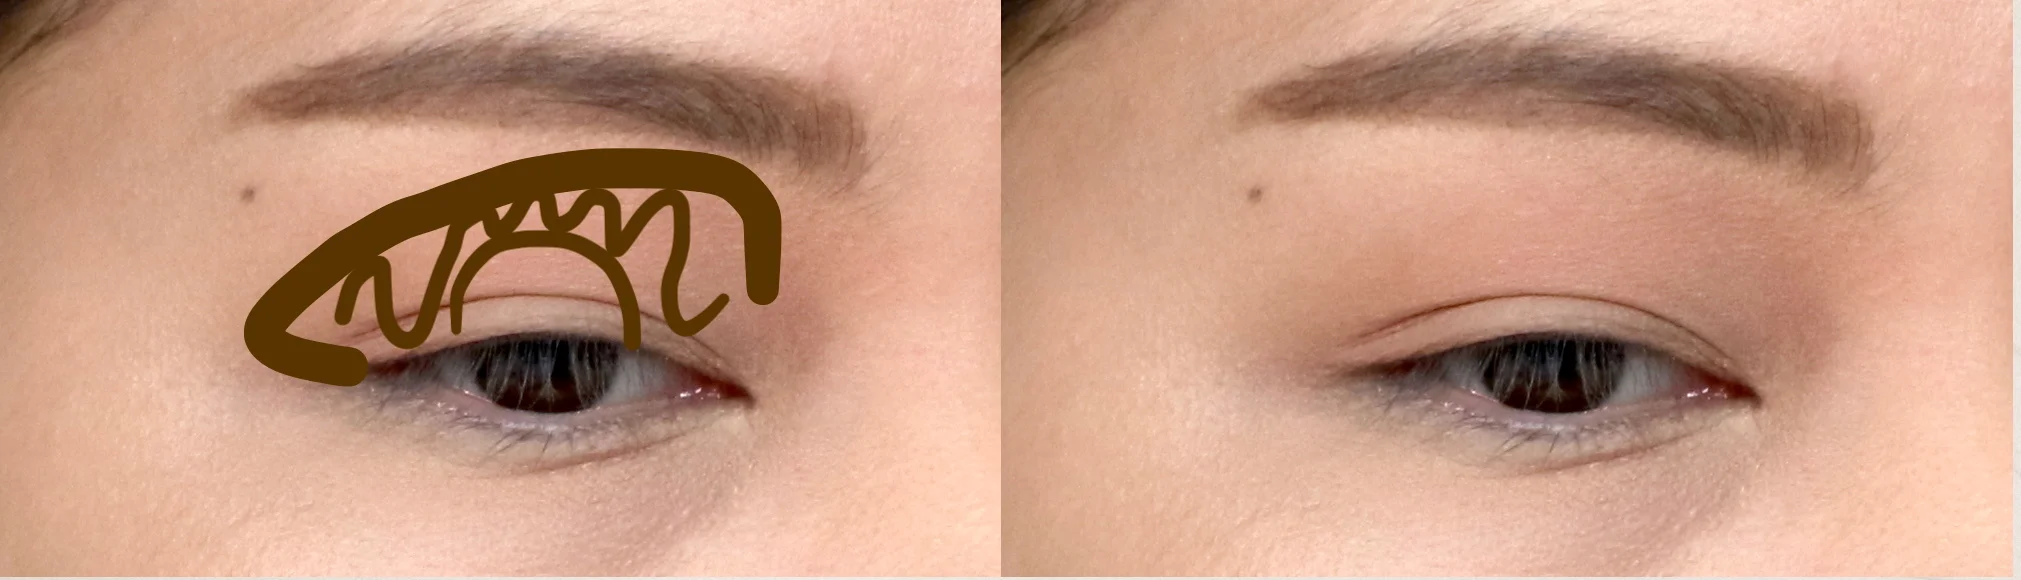
Step 2: Set your transition shade
Not a lot of beauty bloggers talk about this, so let’s define it for everyone’s sake: a transition shade is a light-toned eyeshadow color set around the border of the main eyeshadow colors. They make blending easier and help texturize an eyeshadow look.
With wine eyes, baby pink transitions can bring a certain brightness and coolness that I don’t like. I prefer my wine eyes sultry, intense, and warm, so I stick to light brown as it enhances those moods. You can often find brown-toned transition shade from neutral palettes.
I don’t set the transition shade in a traditional concave shape over the mobile lid. Because my eyes aren’t deep set and my nose bridge isn’t high, I prefer to pull the shading towards the inner part of my brows. This helps create the illusion that my eye sockets are deeper and my nose bridge, higher.
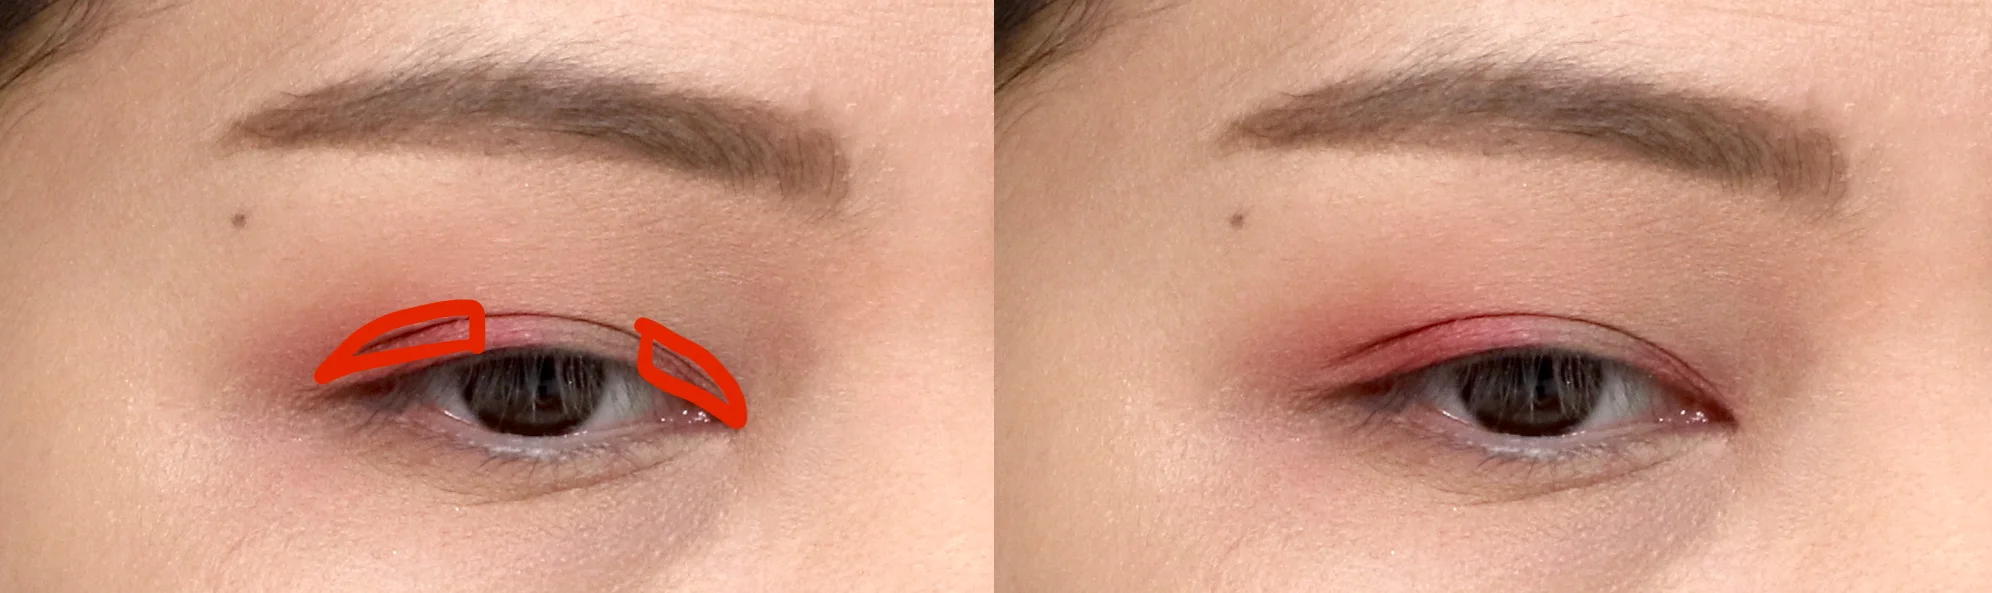
Step 3: Choose your wine color
I like to apply the wine color on the outer v and brush some leftover shadow on the inner part of the eye. I love using glittery berry reds, but you can use any texture and tone of red. I try to stay away from pink-leaning reds though, because it ruins the look and usually doesn’t look good on warm skin tones.
Some great wine palettes to try are: Chica-Y-Chico One Shot Eye Palette in Wine Burgundy (P580 at Althea PH); Etude House Play Color Eyes Wine Party Palette (P1,348 at Etude House); Urban Decay Naked Heat (about P3500 from online stores); Natasha Denona Holiday Palette 5 in Joya (P2,775 at Sephora PH).

Step 4: Deepen with another color
At this point, the eye look appears a little too bright. I like to add dimension to the wine color by deepening the outer v and drawing half the lower lashline with a darker color, such as a matte or metallic purple, or dark brown.
Without completely covering my wine red shade, I add a bit of darker purple to the same areas. Using another color helps to make the eye look more interesting, and combining different textures helps make everything look less flat.

Step 5: Add glitters and aegyosal
For the last step, I add glitters on the center of the lid and the inner third of the lower eye. I prefer a diffused scattering of glitter as opposed to a shimmery metallic. K-Beauty eyes are all about the blended, different sizes and textures of glitters! I normally rely on eyelid oiliness to keep the glitter in place, so if you plan on using glitter glue, keep in mind that it will create a really opaque layer of glitter, which isn’t really part of the wine eye look.
Step 6: Add puppy tail liner and mascara
Again, the specific shape of puppy tail as eyeliner is not crucial in pulling off this look. You can go for a cat eye, classic eyeliner, or any eyeliner shape you like! If you're a monolid like me, there are actually a good number of shape options to choose from. I used a black liquid liner, but a smudgy pencil also looks great with wine eyes. You can also use a deep burgundy liner to add more character to your wine eye look! Lastly, curl your lashes and put on some mascara to complete the come-hither look.
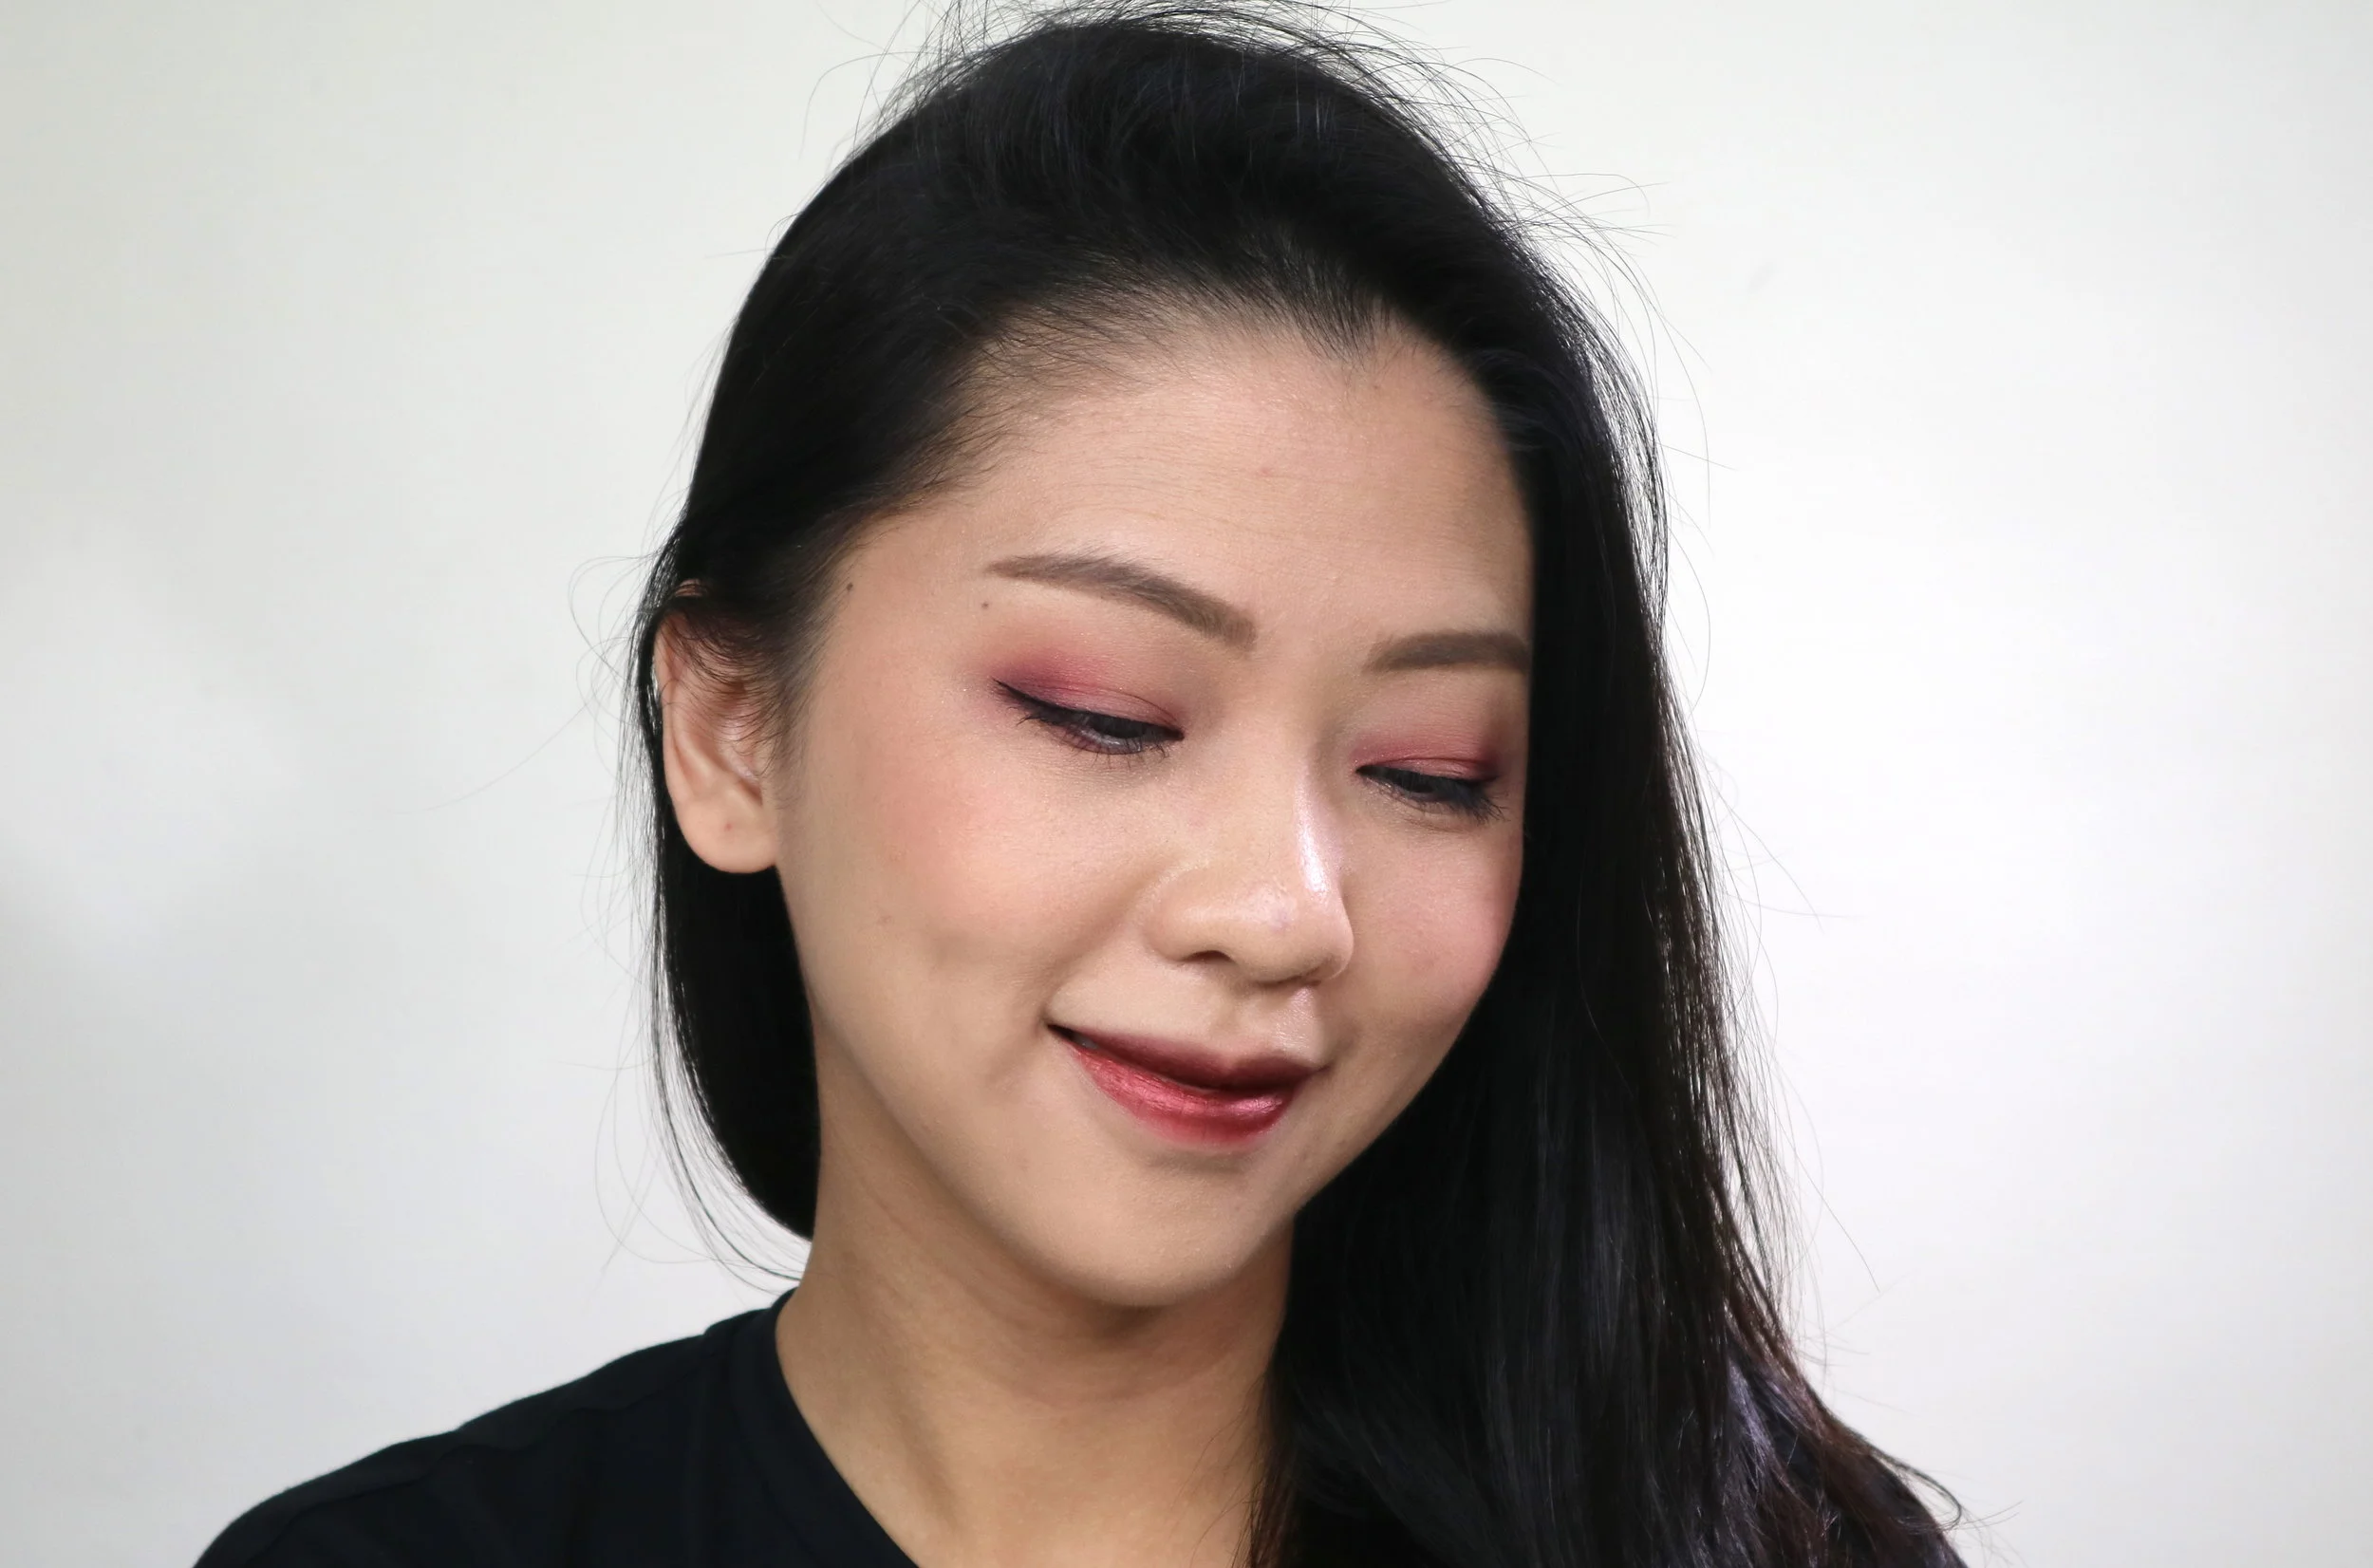
And that’s the look! Wine eyes are pretty forgiving and flexible. You just need to choose colors that evoke the same feeling of a wine-induced flush – warm, relaxed and passionate. Stay away from pinks if you’re not comfortable playing around with color yet, and blend with some browns or purples if the vibrancy of red puts you off. You may also consider layering glitters for a more light-hearted take on the super sultry Western interpretation of wine eyes.
What do you think of the wine eye look? Would you try this, and where would you wear it to?