This is how to make your lashes look like falsies (without actually using falsies)
Fun trivia of the day: did you know that Jeremy Renner (a.k.a. Hawkeye from The Avengers) used to be a makeup artist? He believes that all it takes for a polished look is doing the lashes, lids, and lips. Frankly, I’m glad he got into acting because que horrore, as much as I scream yas girl at lashes, he cannot have seriously left out kilay in that list, right?!
Anyway, that’s beside the point. Eye makeup can take your look to level 11, and lashes play a huge role in that. There are a few considerations to making your lashes look like falsies. Let’s start from the roots all the way to the tips!
Bare lashes and invisible eyeliner
Step 1: Draw a "lush" lashline
A typical set of falsies will have a lash band, that long black strip where all the false lashes are glued to. A black “scalp” for your lashes makes them appear lusher and thicker, even if you don’t do much on the actual length of you lashes!
You can replicate this effect on your own skin by doing the invisible eyeliner shape. We don’t recommend a very dramatic and heavy eyeliner shape - anything more than the invisible liner tends to “eat up” the apparent length of your lashes!
Step 2: Create a standout curl
There are several grades of tightness for eyelash curls; the best match will depend on your eye shape, resting angle of natural lashes, and personal preference. No matter which look you choose, what makes lashes look obviously “man-made” is when you don’t crimp it at different angles. Falsies always have an elegant, smooth curl. Review eyelash curling 101 here!
Curling your lashes more in one place can really help the angle go higher; also angling the curler at almost 90 degrees from your eyes also helps!
Step 3: Keep them neat
Natural design falsies often have criss-cross, multi-angled strands. Regular designs, however, will be flatter and more even. A way to make your lashes look more polished is to use a metal lash comb before and after curling, and before and after applying mascara. Separating your lashes before curling them helps them set more neatly, and the pointed prongs can additionally help get rid of clumps!
Using my favorite Heroine Make Volume and Curl Mascara
Step 4: Use a good mascara and apply it properly
Any false lash design, whether made with natural or synthetic fibers, will always have smooth fibers. No spider lashes! If you need to absolutely choose one type, stick to lengthening mascaras as falsies tend to go longer rather than thicker. Liz gives a mascara application tutorial here that’s perfect for making your natural ones look fake – in a good way! Just remember to deposit most of the mascara at the base, then brush up to lengthen.
An affordable mascara to try out is the Maybelline Lash Sensational. This holds the curl of the lashes well while providing a lot of length. For really crazy curl + length + volume, the Majolica Majorca Lash King is our HG! It's completely waterproof too and makes our lashes look like falsies every. Single. Time. (Editor's Note: this mascara is the reason I normally don't bother with falsies. - Liz)
Normal way of curling + mascara
The PV Way of curling + mascara
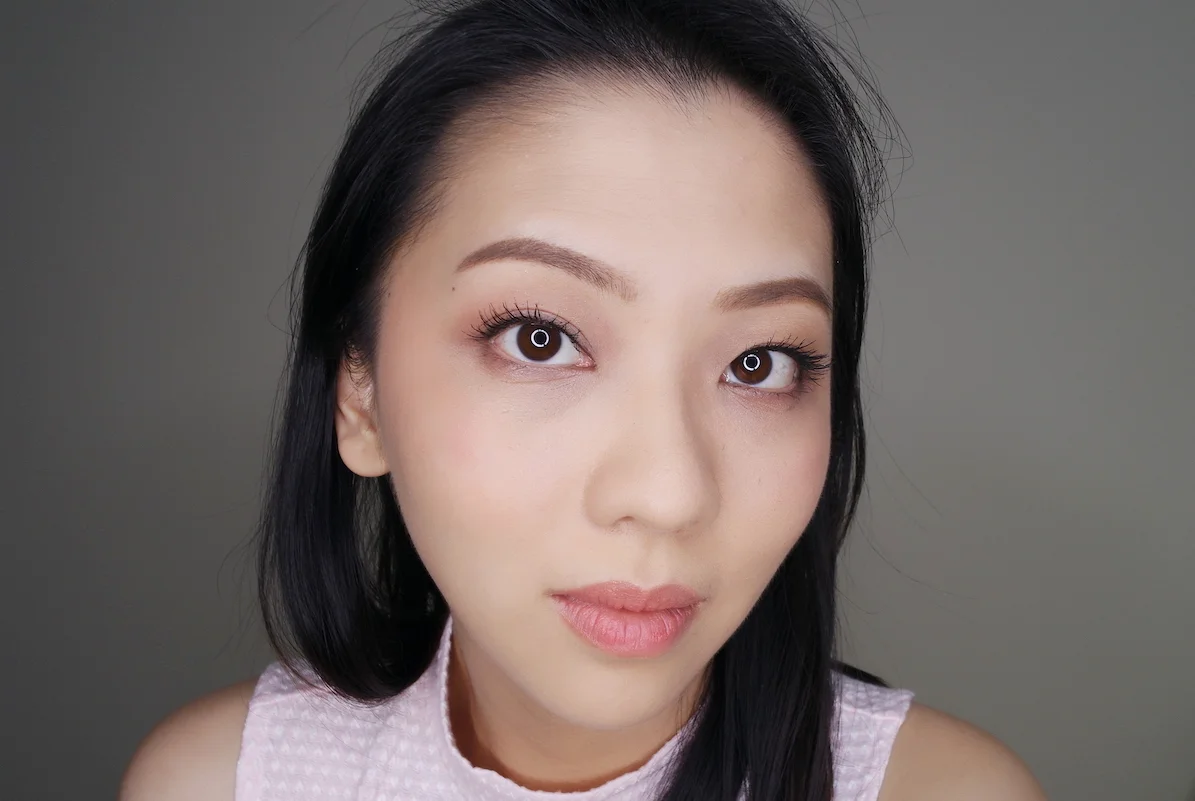
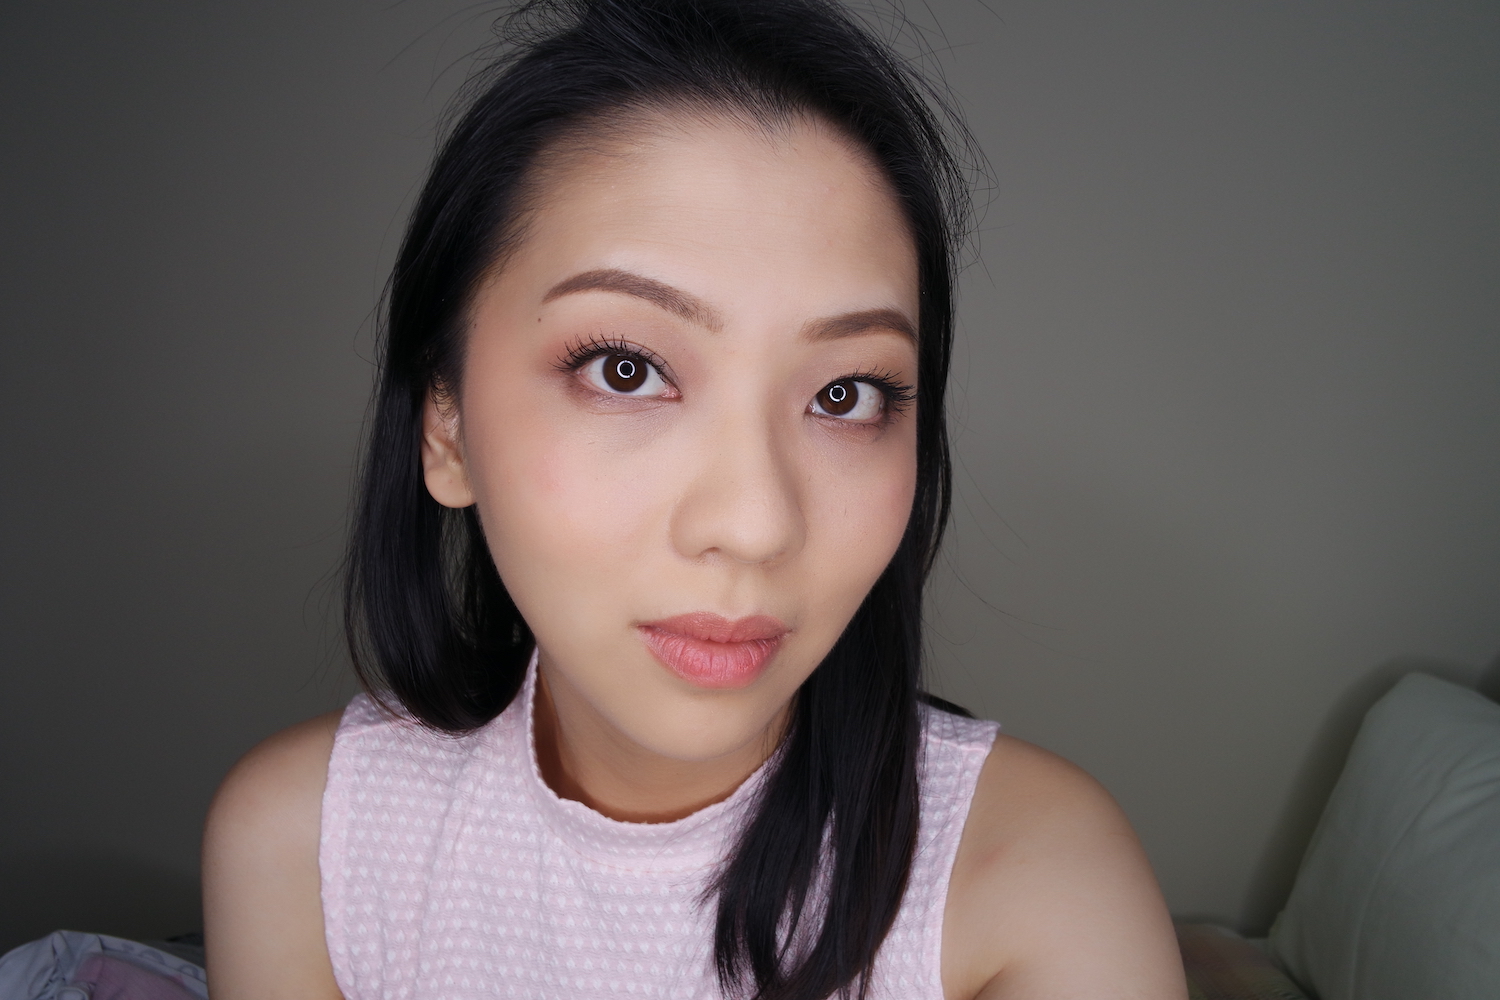
It’s difficult to appreciate how crucial these four steps are until you see the cumulative effects of each hack side-by-side. The top photo shows how I used to curl my lashes, and the bottom photo shows the 4-step PV lash hack to make your lashes look like falsies.
Clearly, the first method doesn't have as dramatic an effect as the second. The left eye has naturally messier lashes (as compared to the right) and not combing them leads to clumped, shorter-looking lashes. Not concentrating product on the base, as explained here, and neglecting to draw an invisible eyeliner, also causes me to lose so much apparent lash length!
The curl looks similar here, but I swear in person the hack-version is clearly more fanned out and dramatic-looking!
Are you girls ready to try falsifying your lashes? If we missed any tips, share it in the comments!


